|
You can normally set up the GT10Q-SB and the BA10 in the following steps.
-What you need
Hardware
- PC
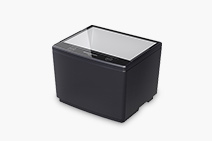
- GT10Q or GT10B
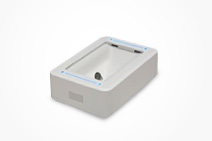
- BA10-RKU
- USB cable attached to the BA10-RKU
Software
Manuals
-Connection procedure
Connecting BA10 to the PC via USB-COM interface
Switch the interface of the BA10 to the USB-COM in the following procedure, because its default is USB keyboard
- 1.Download the BA Setting and install it on your PC.
- 2.Download the Active USB-COM Port Driver and install it on your PC.
Refer to the Active USB-COM Port Driver Installation Guide for the details of installation procedure.
- 3.Connect the BA10 to the PC's USB port with the attached USB cable.
- 4.Switch the BA10 to the setting mode by pressing the SETUP button provided on the bottom for at least 0.5 second.
The Interface/power supply LED blinks in orange when the setting mode is enabled.
Found New Hardware Wizard automatically starts by the PC.
- 5.Install the driver by following the Active USB-COM Port Driver Installation Guide.
- 6.Start the BA Setting on the PC.
When the following window appears, click OK.
- 7.Select the USB-COM interface on the BA Setting as shown below.
- 8.Select Update set data from the File menu in the BA Setting.
The "Update completed" dialog is displayed and the BA10 restart automatically.
The USB-COM interface is established in the BA10.
Connecting GT10 to BA10 via Bluetooth
Connect the GT10 to the BA10.
- 1.Read the bar code printed on the back of the BA10 with the GT10 to connect the GT10 to the BA10 via the Bluetooth wireless link.
After the GT10 read the bar code on the BA10, the GT10 (master unit) begins to connect to the BA10.
On completion of the connection, the GT10 beeps twice and the LED green lights up for 0.5 sec. At this time, the LED blue lights up in the BA10.
Preparation for processing the data read by GT10
Convert the data received from the USB virtual COM port to keyboard input data for processing the data read by GT10.
- 1.Download the QR_kbif and install it on your PC.
- 2.Start the QR_kbif.
When the Com Port Setting window appears, select the USB virtual COM port number to which the BA10 is connected.
You can confirm the USB virtual COM port number on the Windows' Device Manager.
- 3.Open some application, for example, the Windows' Memo and then read any bar code with the GT10.
- The read data is displayed on the application program's screen.
As an alternative, you can create application programs that receive serial communications data without the QR_kbif.
-Parameter setting procedure
Setting with QR Code Menu or Bar Code Menu
Use the QR code menu or bar code menu to designate the basic parameters such as available bar code types. Refer to the GT10 User's Manual for the available parameters and the menu.
Setting with Scanner Setting 2D or Scanner Setting
Use the configuration software to designate the detailed parameters such as scanner's reading mode.
Scanner Setting 2D (for GT10Q series)
Scanner Setting (for GT10B series)
Follow these steps to use the configuration software.
- 1.Install the Scanner Setting 2D or Scanner Setting on your PC.
- 2.Connect the GT10 to the BA10 via the Bluetooth wireless link.
- Then, connect the BA10 to your PC via the USB-COM interface.
- 3.If the BA Setting or QR_kbif software is running, turn it off.
- 4.Start the Scanner Setting 2D or Scanner Setting.
- 5.When the following option setting window appears, select the the USB virtual COM port number to which the BA10 is connected and the product name of your scanner.
- Click OK.
- 6.Set each of the required parameters by following the menu.
- 7.Select Update set data from the File menu.
On completion of the parameter setting, the GT10 beeps three times and the LED blue blinks three times.
|