Introduction
support section

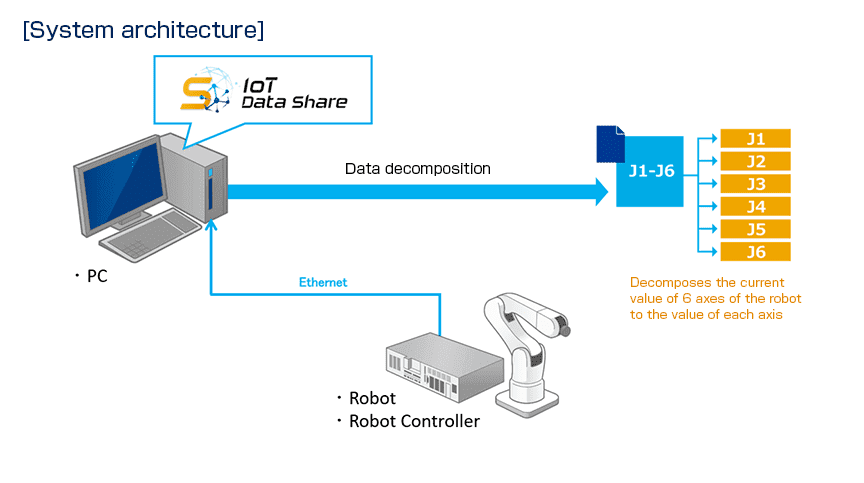
Outline
The data of the equipment (current value of 6 axes) collected by IoT Data Share
on the PC is decomposed using the sub-item function.
Equipment information of the connection destination
- Controller name : RC8
- Item name : Joints_ElectricData (Data type : VT_R8 | VT_ARRAY)
- Subitem name1 : Joint1 (Data type : VT_R8)
- Subitem name2 : Joint2 (Data type : VT_R8)
- Subitem name3 : Joint3 (Data type : VT_R8)
- Subitem name4 : Joint4 (Data type : VT_R8)
- Subitem name5 : Joint5 (Data type : VT_R8)
- Subitem name6 : Joint6 (Data type : VT_R8)
* It is assumed that axis information of the robot can be obtained from the facility equipment.
Step 1Creating sub-items 1
To decompose the current value of 6 axes of the robot into the value of each axis, add 6 sub-items.
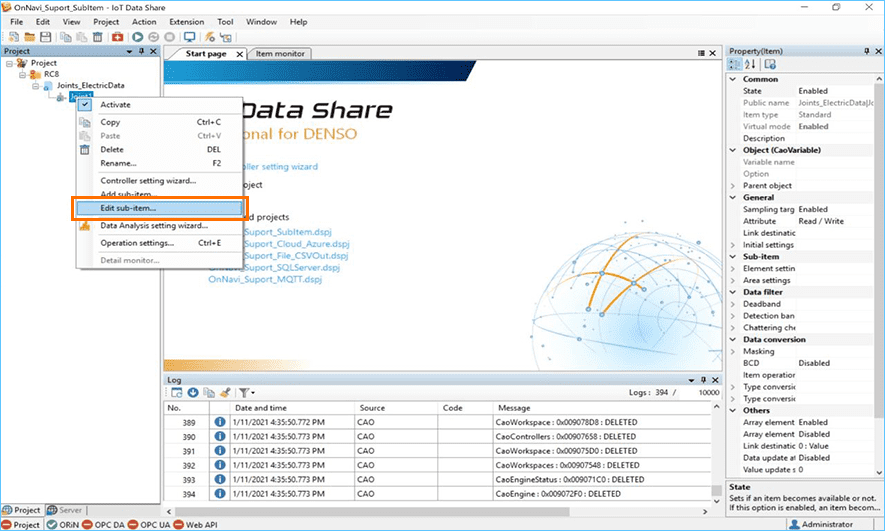
 From the [Project] tree, select the controller [RC8] - item [Joints_ElectricData],
and select [Add sub-item] from the right-click menu.
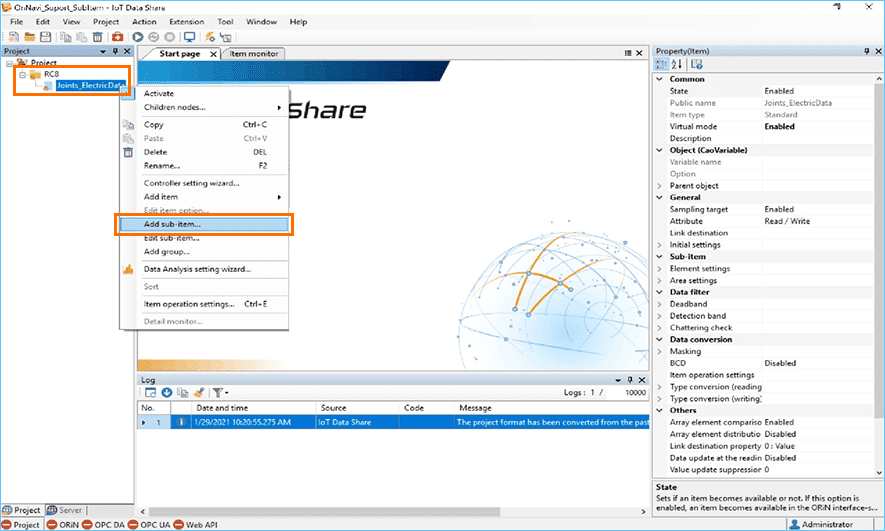
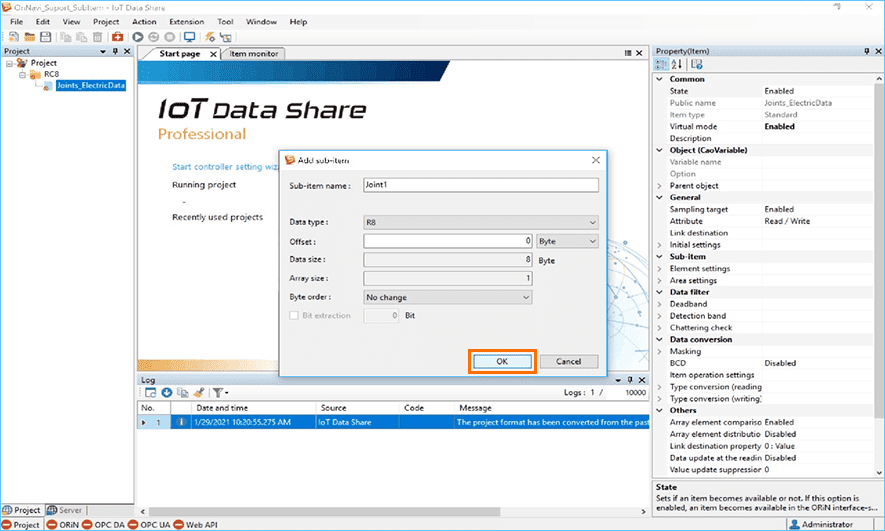
 Add the first sub-item.
Set [Sub-item name] in [Add sub-item]. Here, enter "Joint1".
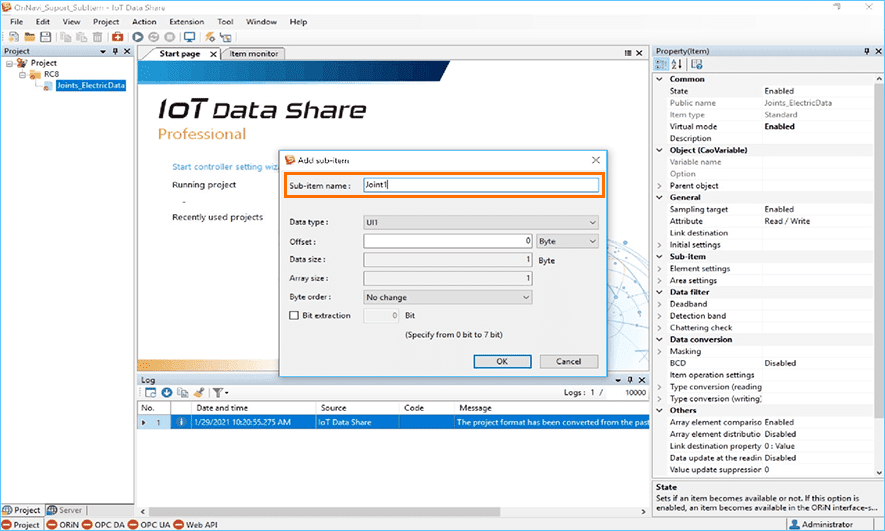
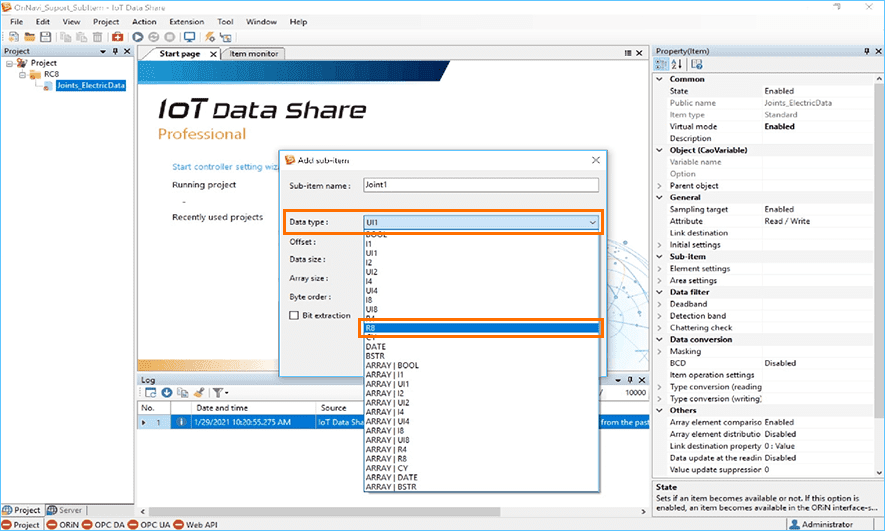
 Set the [Data type].
Here, select [R8] from the datatype list.
 Confirm the input items, and click the [OK] button.
 Set the area. Click the [Yes] button.
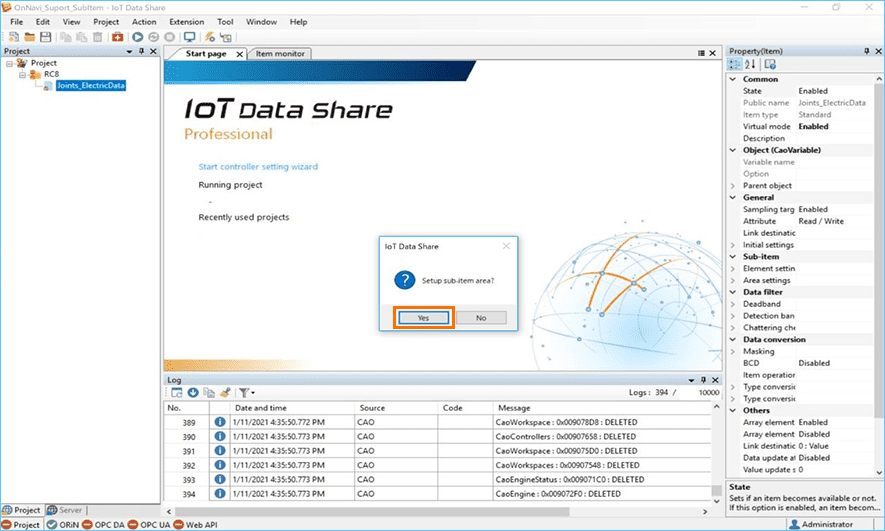
Note
If the area is not set by clicking the [No] button, the area is set to "0".
If you start the project in that state, an error will occur.
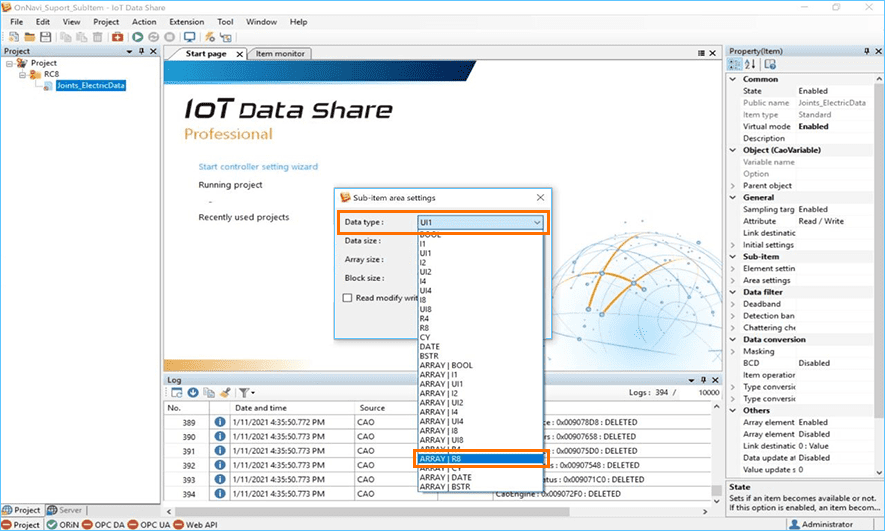
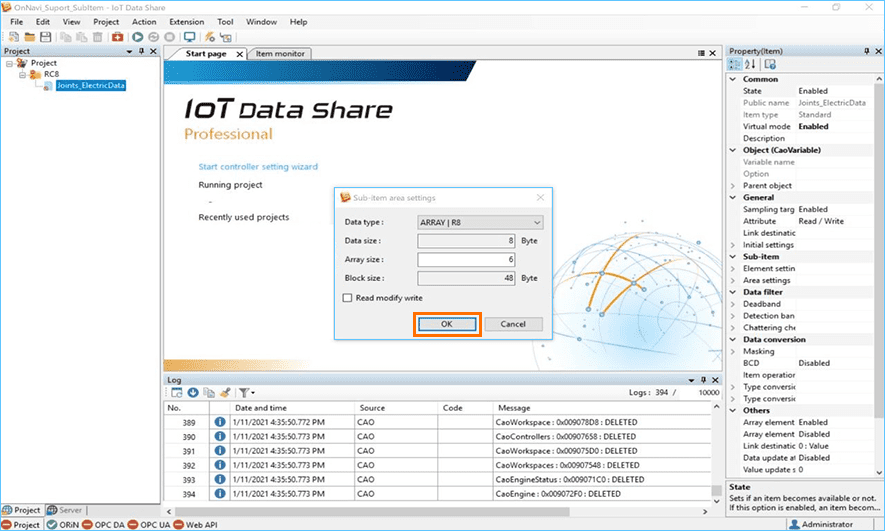
 Set the [Data type].
Here, select [ARRAY | R8].
 Enter [Array size].
In this case, enter "6".
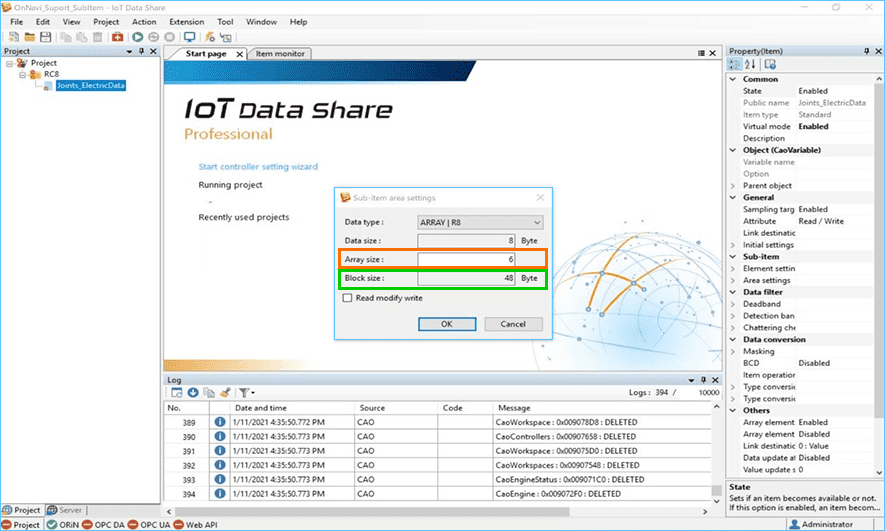
Note
If you enter [Array size], [Block size] is calculated automatically and the data size of the area can be checked.
 Confirm the input items, and click the [OK] button.
This completes "Creating Sub-Items 1".
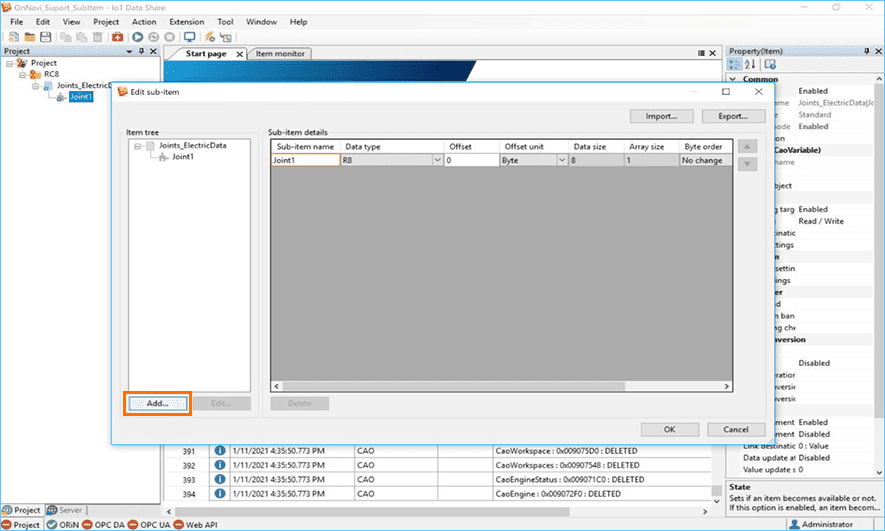
Step 2Creating sub-items 2
Then add the second and subsequent sub-items.
Select the added sub-item [Joint1] and select [Edit sub-item] from the right-click menu.
Note
You can also add six sub-items by repeating steps 2 through 8 of Step1.
Click the [Add] button.
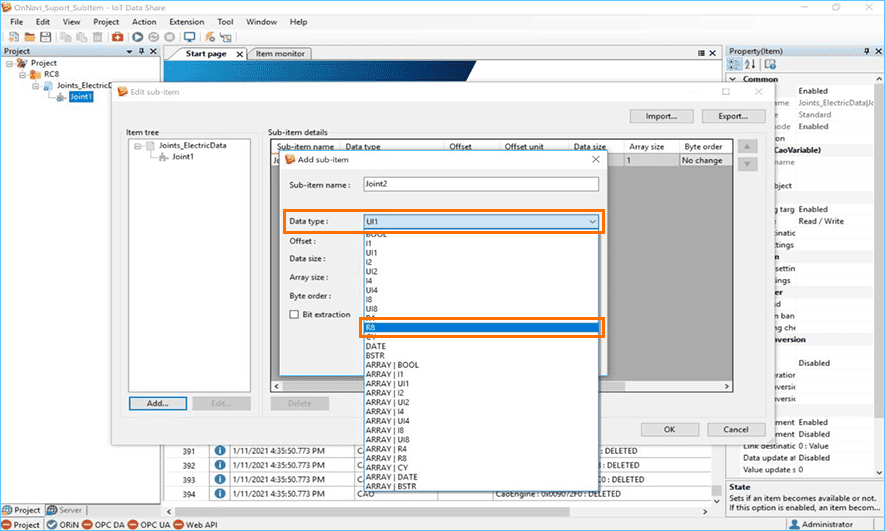
Set [Sub-item name] as desired.
Here, enter "Joint2".
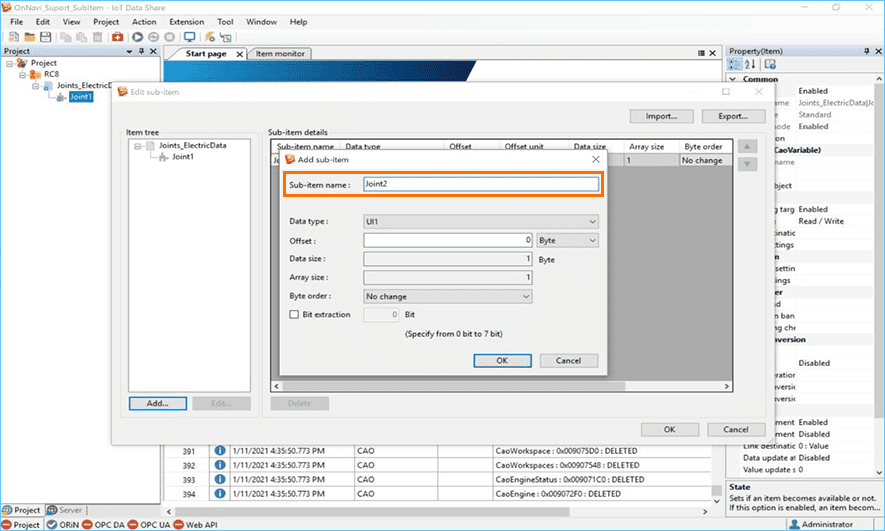
Set the [Data type].
Here, select [R8] from the data type list.
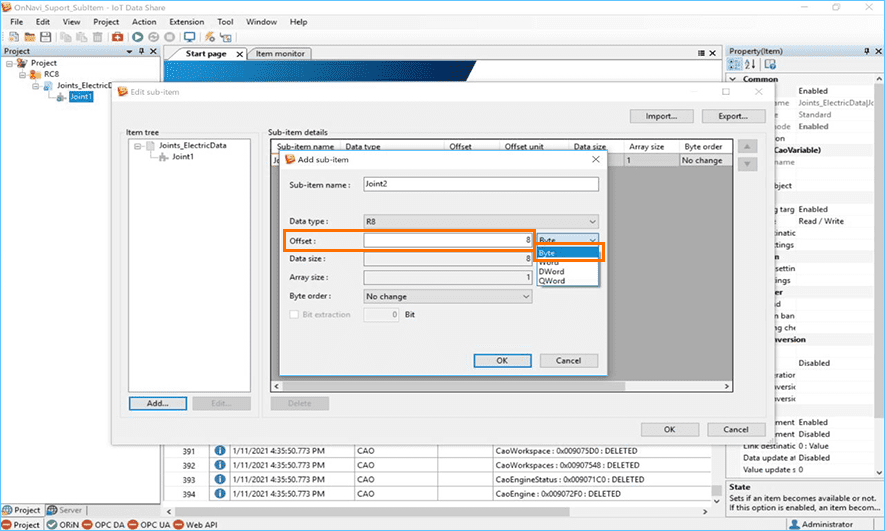
Set [Offset] and the unit.
Here, enter the offset "8" and select "Byte" from the list of units.
Note
[Offset] is the reading position of the data area.
Calculate the offset considering the size of the sub-item data type.
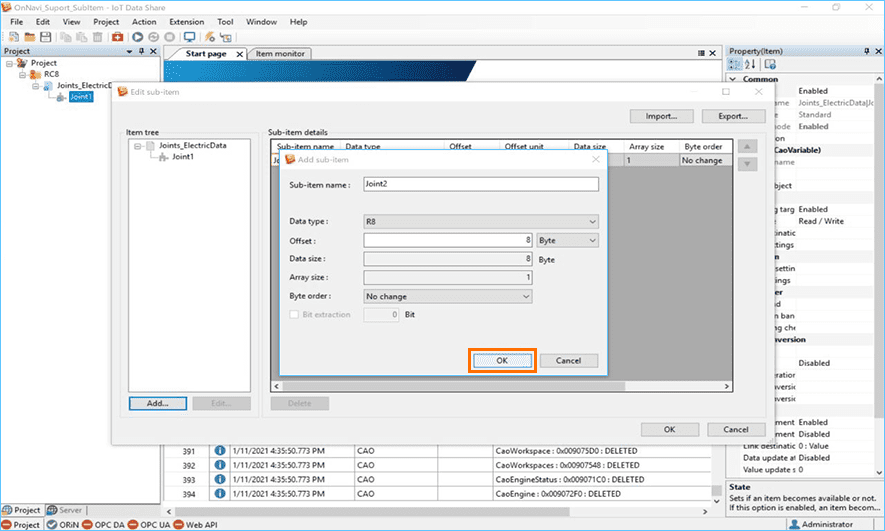
Confirm the input items, and click the [OK] button.
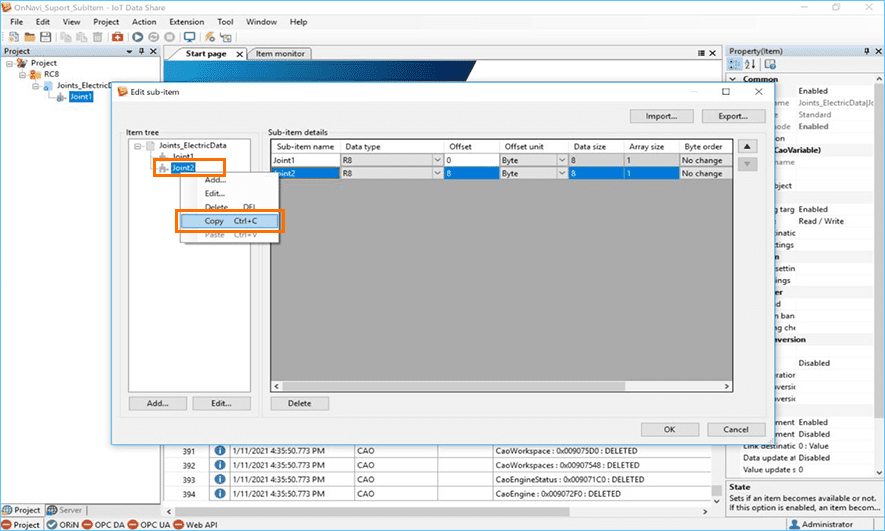
Select the added [Joint2] and select [Copy] from the right-click menu.
Note
You can also copy by pressing the
[Ctrl + C] key on the keyboard.
With [Joint2] selected, select [Paste] from the right-click menu.
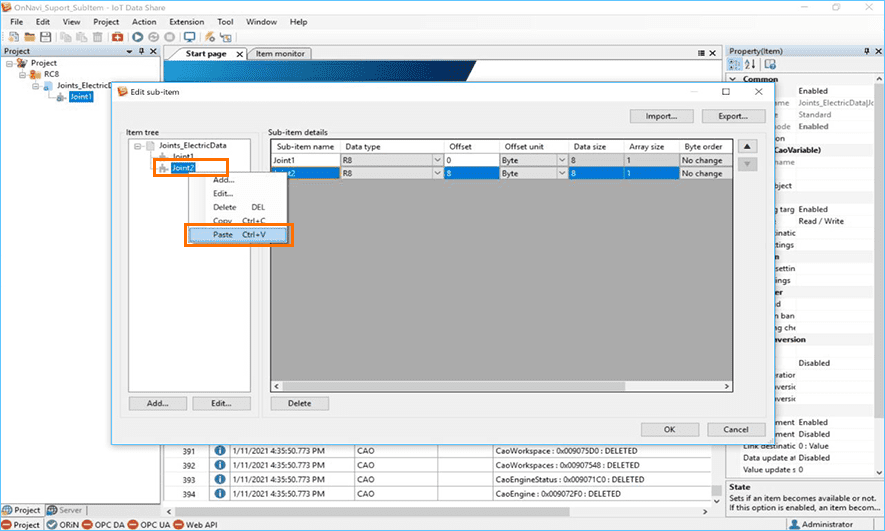
Note 1
You can also paste by pressing the
[Ctrl + V] key on the keyboard.
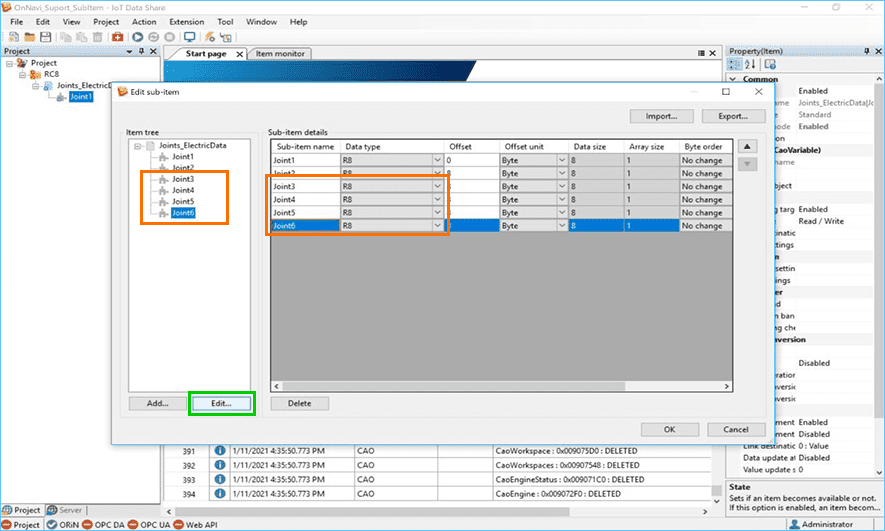
 This time, as we will decompose the data into six axes, we will add six sub-items.

 Set the names of the four added sub-items as desired.
Select the target item from [Sub-item name] in [Sub-item details] and click again.
Here, enter "Joint3", "Joint4", "Joint5", and "Joint6" for the sub-item.
[Data type] remains unchanged.
Note
You can also change the [Sub-item name] by selecting the target item and clicking the [Edit] button.
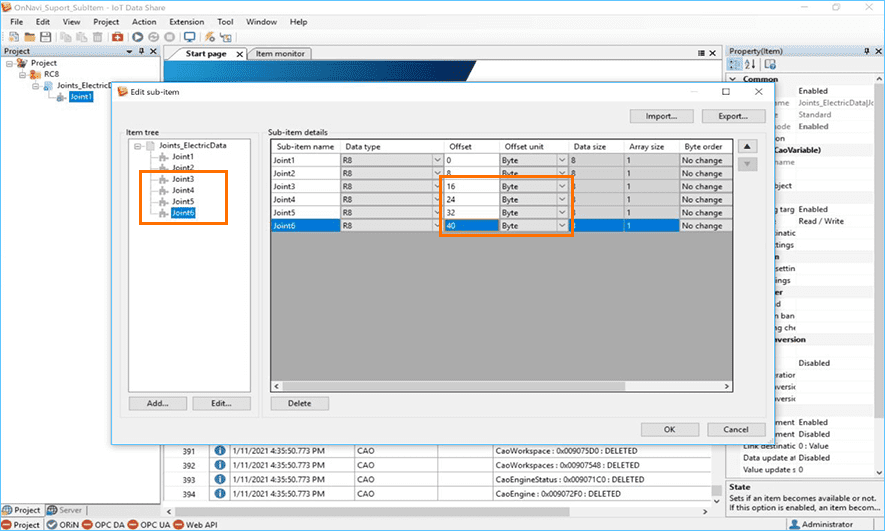
 Set the [Offset].
Select the target item from [Offset] in [Sub-item details] and click again.
Here, enter the offsets "16", "24", "32", and "40", respectively.
[Offset unit] remains unchanged.
 Check the setting items, and click the [OK] button.
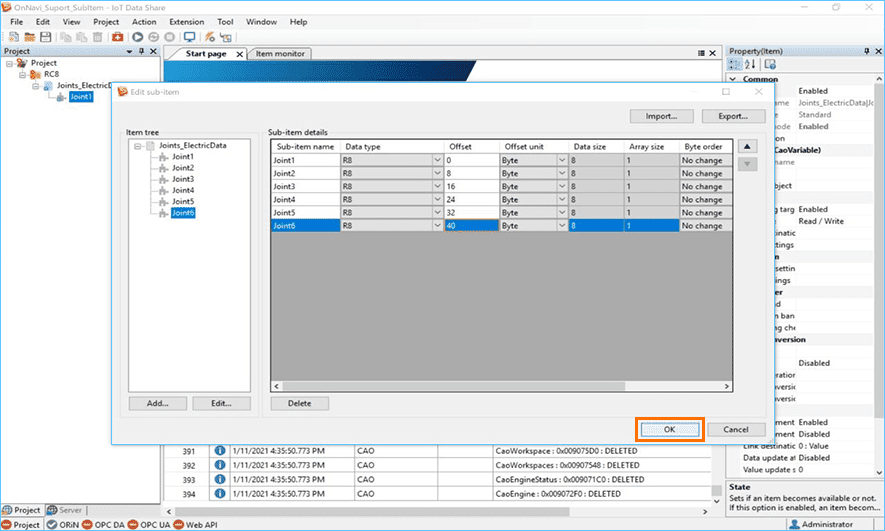
This completes "Creating Sub-Items 2".
Step 3Verify that data is being collected from equipment.
* For details on how to save and start a project, refer to Chapter 1 Lesson2 of <Learning contents> [Basics]
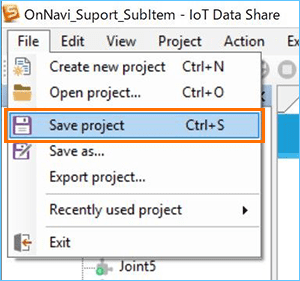
Select [Save project] from the [File] menu.
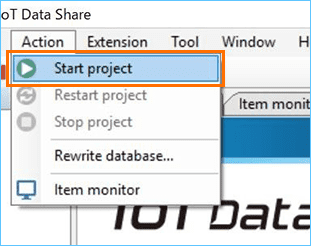
Select [Start project] from the [Action] menu.
Review the data before it is decomposed in IoT Data Share and the data after
it is decomposed.
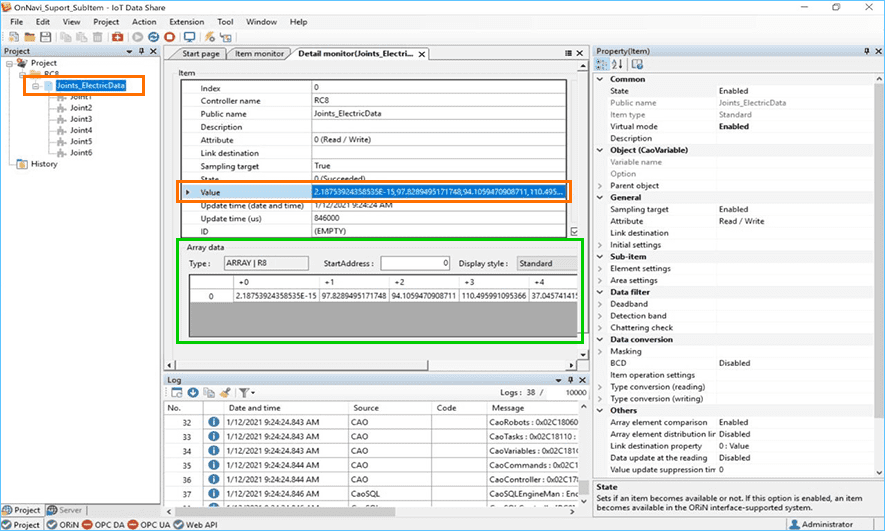
First, double-click the item [Joints_ElectricData] and check [Value] on the monitor
screen that appears.
Note
Item [BusyStatus] is added to this project to collect the 6-axis current of the robot.
Note
The number of array data elements that can be checked with [Value] on the monitor screen is 10.
11 or more array data will be displayed as "...".
In this case, you can check the data in the [Array data] field.
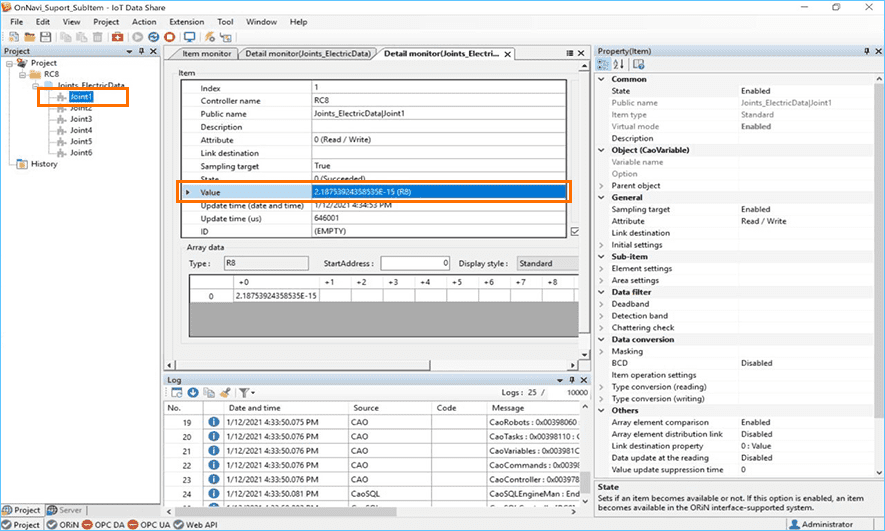
Next, double-click the sub-item [Joint1] and check [Value] on the monitor screen
that appears.
●This completes the "How to decompose data using the sub-item function" procedure.