Introduction
support section

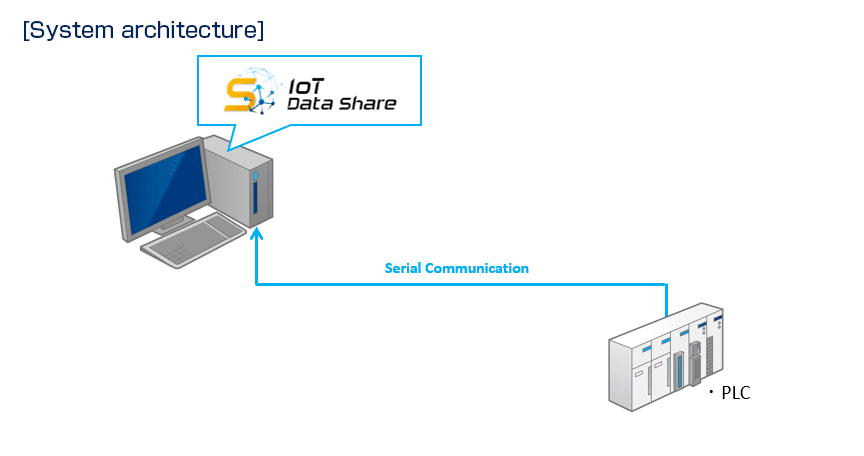
Outline
Connect the equipment (Mitsubishi Electric PLC MELSEC Q Series, iQ-R Series)
by serial communication with IoT Data Share on the PCs and collect the values.
IoT Data Share settings connect to equipment
- Controller name : Melsec_Q
- Item name1 : Data1 (Variable name : D0)
- Item name2 : Data2 (Variable name : CS0)
Equipment information of the connection destination
For the setting of the equipment, use the application of each equipment manufacturer.
* Refer to the manufacturer's manual for the setting and operation method.
Third-party productsMitsubishi Electric PLC MELSEC Q Series/iQ-R Series
 PC side I/F
Select [Serial USB].
- PC side communication detailed setting : RS-232C
- COM port : COM1
- Transfer rate : 19200 bps
 PLC side I/F
Select [CPU Unit] or [C24].
One of the following conditions is required.
<CPU unit : When using the CPU module with built-in serial port>
- CPU mode : (CPU mode of your equipment)
<C24 : When using a serial communication module>
- Model name : (Type of serial communication unit used)
- Station number : 0
- Parity : None
[Important]
If the equipment settings have been changed, restart the equipment.
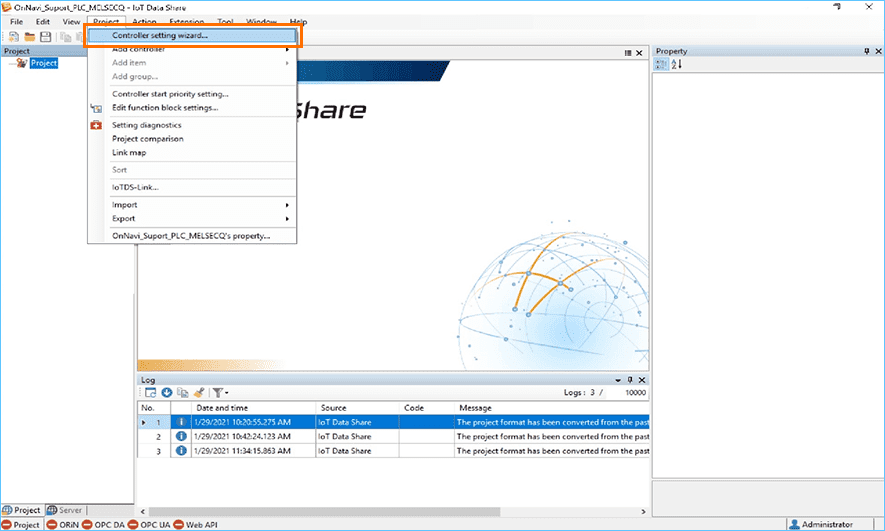
Step 1Item settings for retrieving data from MELSEC Q Series PLCs
Use the controller configuration wizard to configure the controllers and items for retrieving data from equipment.
 Select [Controller setting wizard] from the [Project] menu.
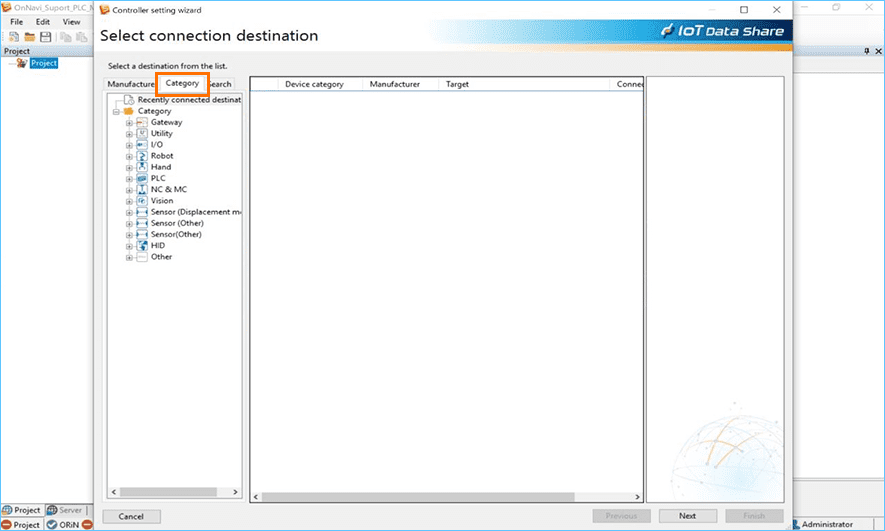
 First, setting up the controller.
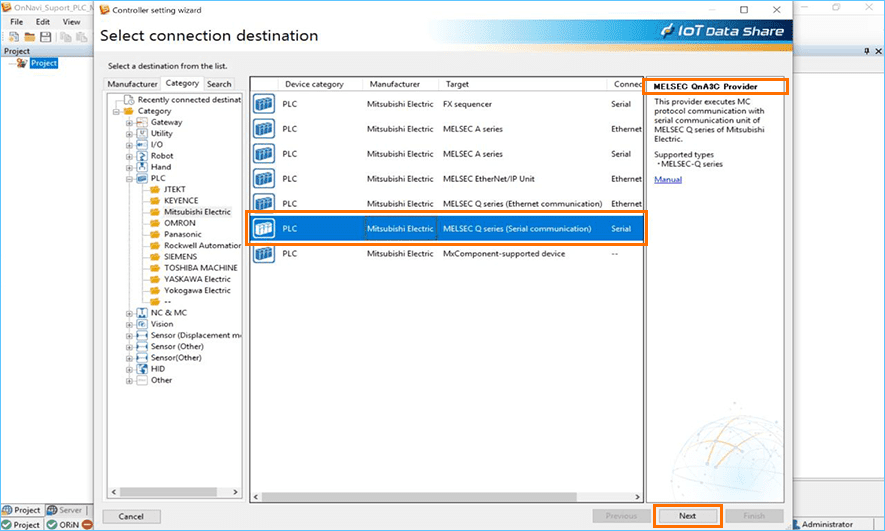
Select [Category] from the Search tab.
 Select [Category] - [PLC] - [Mitsubishi Electric] from the search tree.
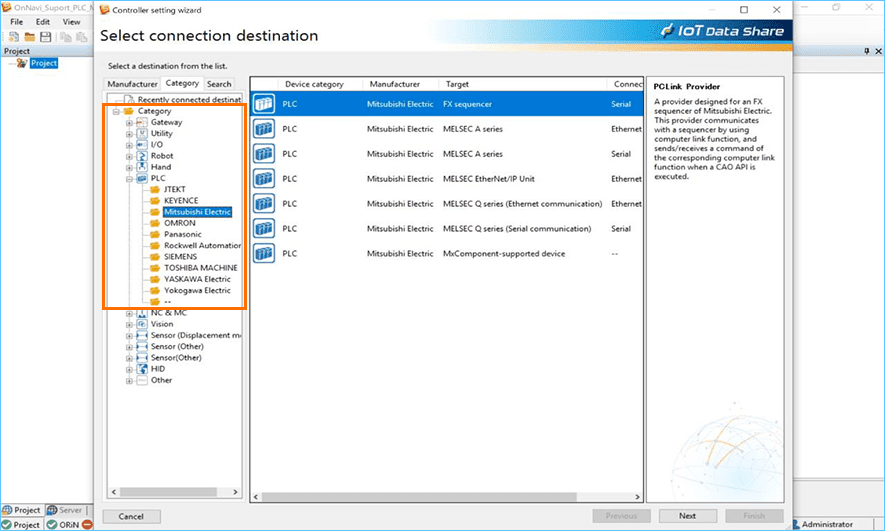
 Select "MELSEC Q Serial Communication" from the list displayed.
After selecting, make sure that the displayed provider name is "MELSEC QnA3C Provider",
and then click [Next].
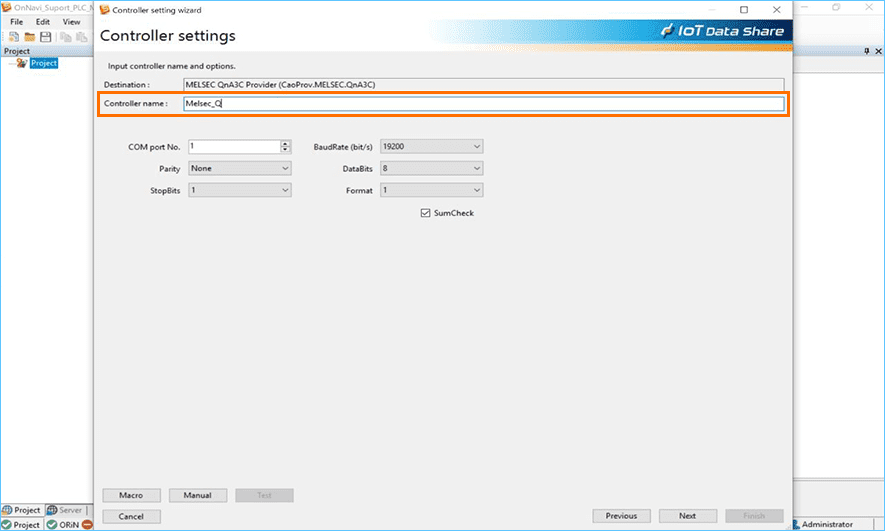
 Then, add the controller. Optionally set the controller name.
Here, enter "MELSEC Q".
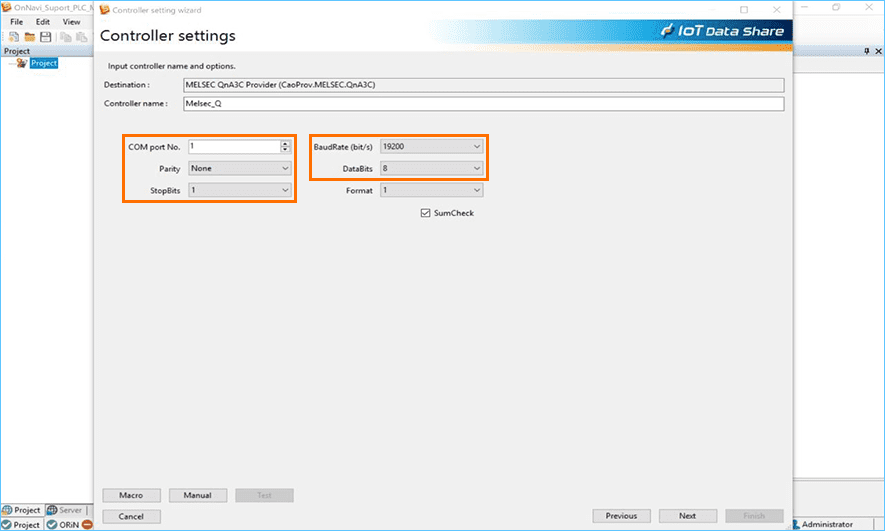
 Set [COM port No.], [BaudRate (bit/s)], [Parity], [DataBits], and [StopBits].
Here, select COM port No. "1", communication speed "19200", parity "None",
data bits "8", and stop bits "1".
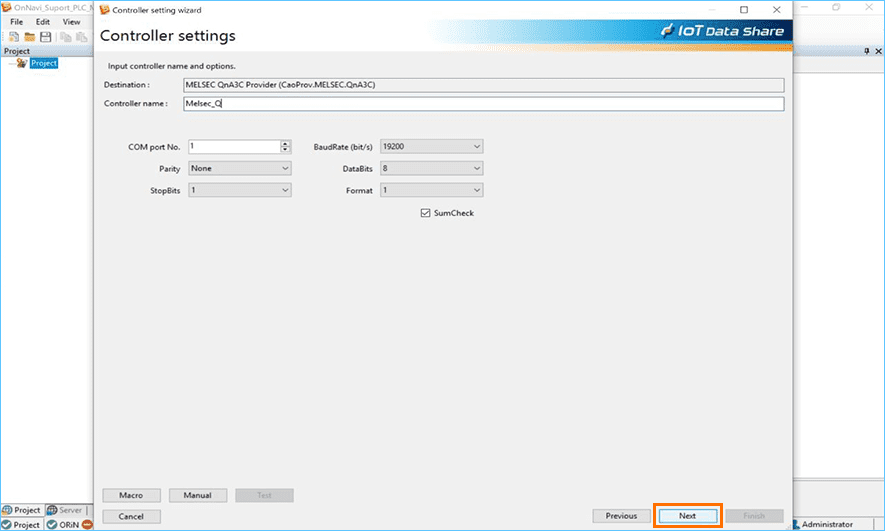
 Confirm the input items, and click the [Next] button.
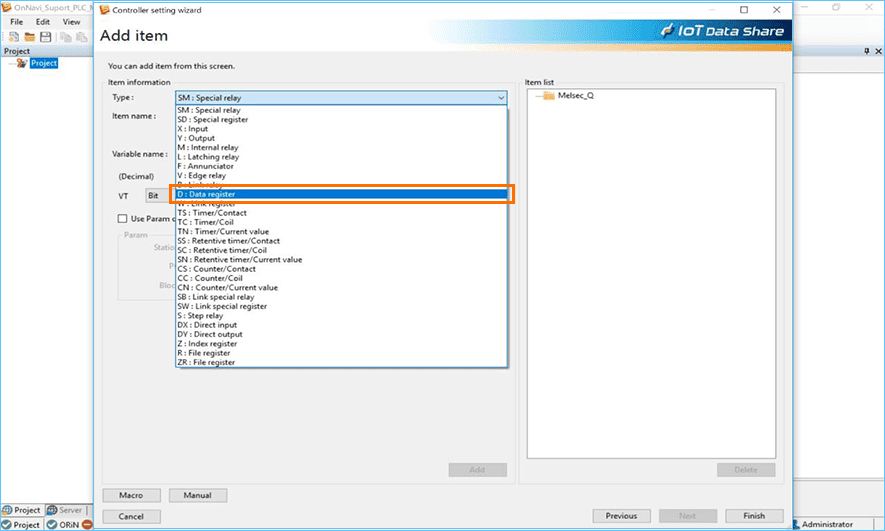
 Then add the item. Set the [Type] of the item.
Here, select "D: Data Register".
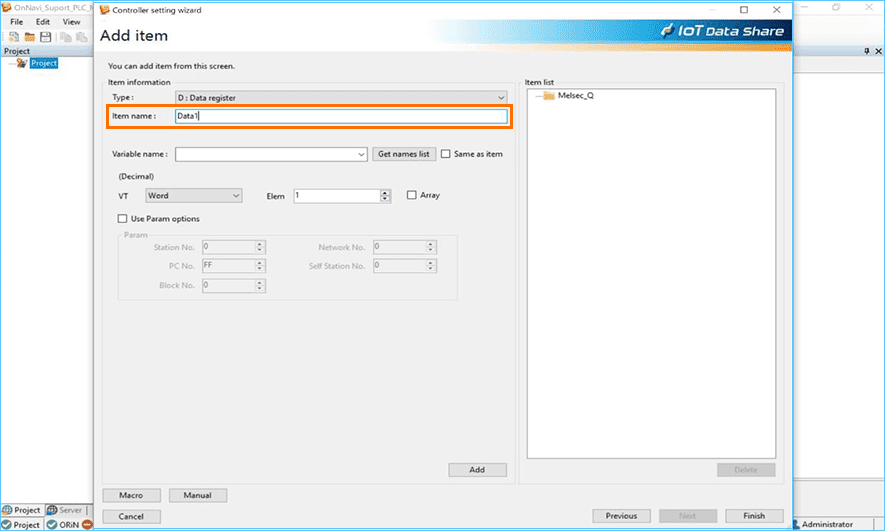
 Set [Item name] as desired.
Here, enter "Data1".
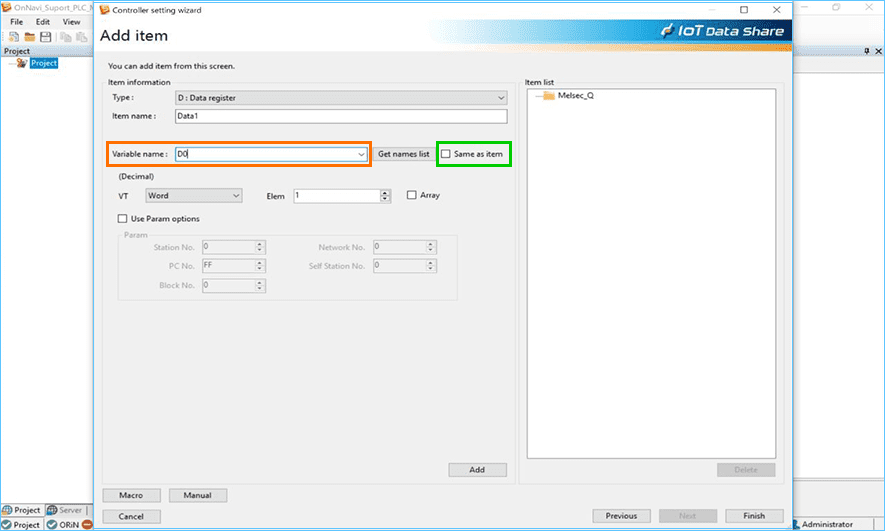
 Set the [Variable name].
Here, enter "D0".
Note
If the [Same as item] check box is selected, the name entered in [Item name] can be set as [Variable name] without entering [Variable name].
 Click the [Add] button to confirm that the item has been added.
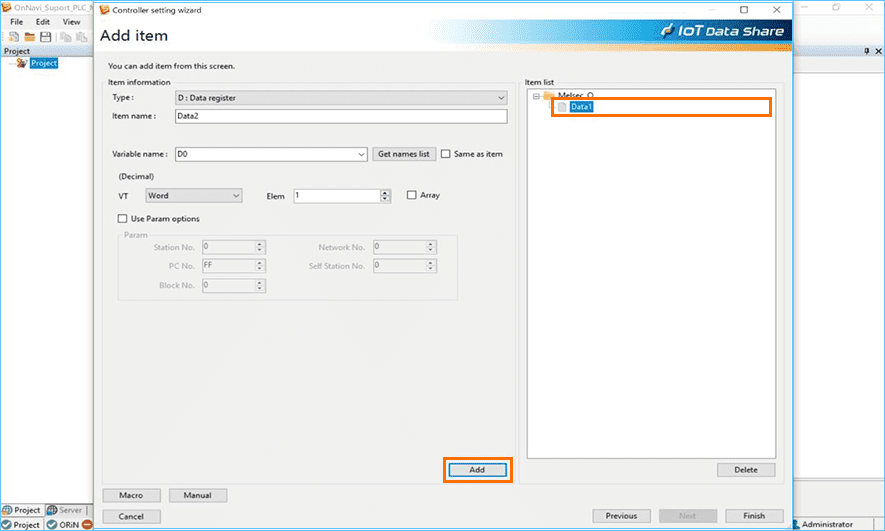
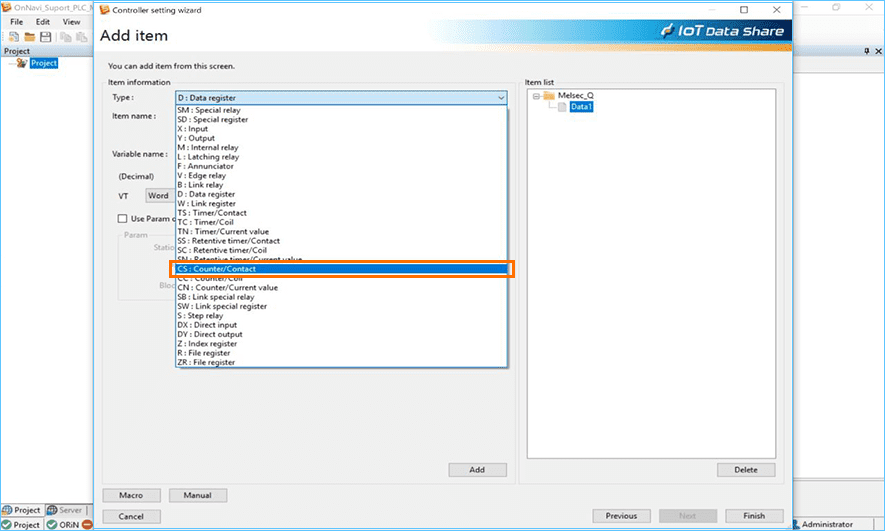
 Set the [Type] of the second item.
Select "CS: Counter/Contact" here.
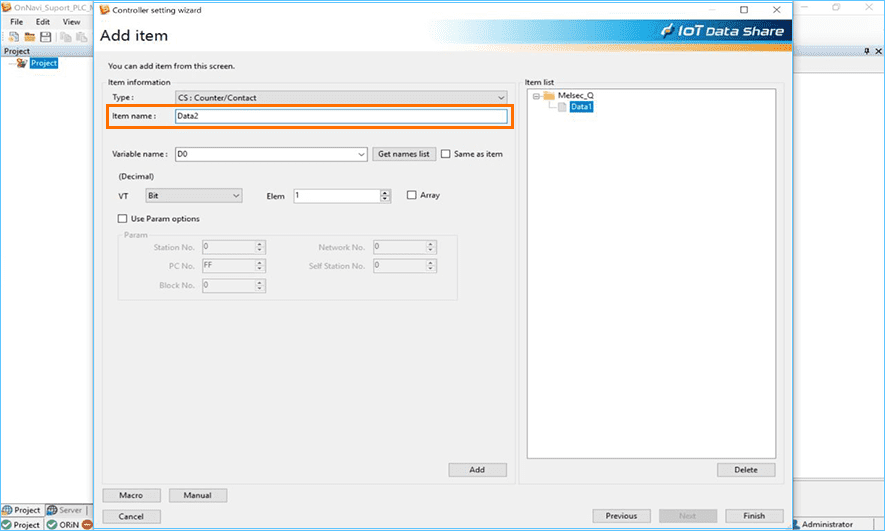
 Set [Item name] as desired.
Here, enter "Data2".
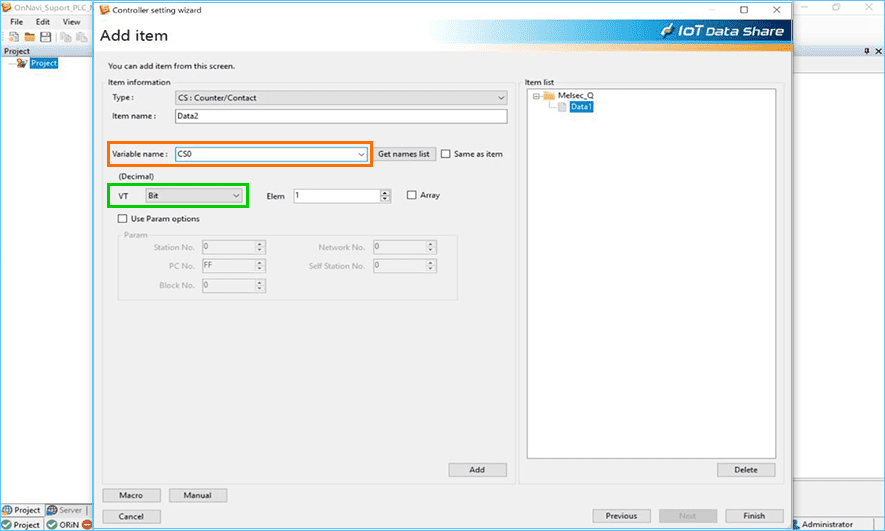
 Set the [Variable name].
Here, enter "CS0".
Note
Select the data type for [VT], but select [Type] to automatically select the data type.
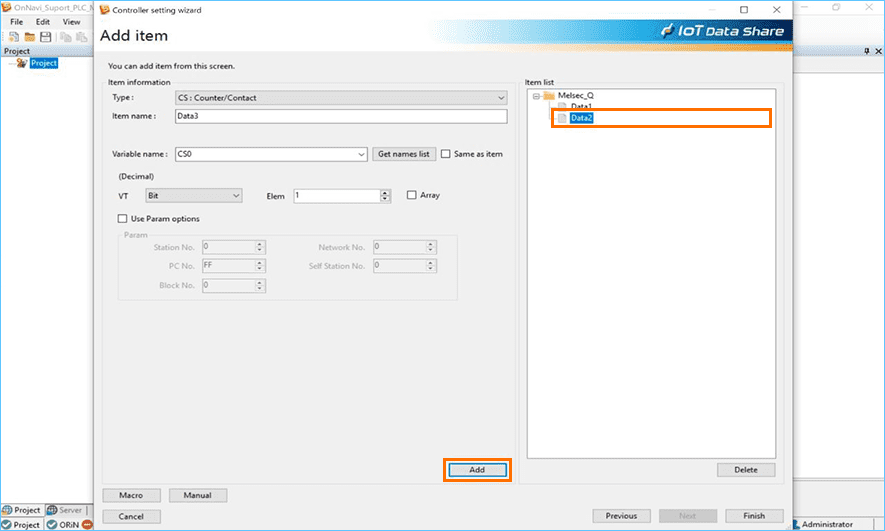
 Click the [Add] button to confirm that the item has been added.
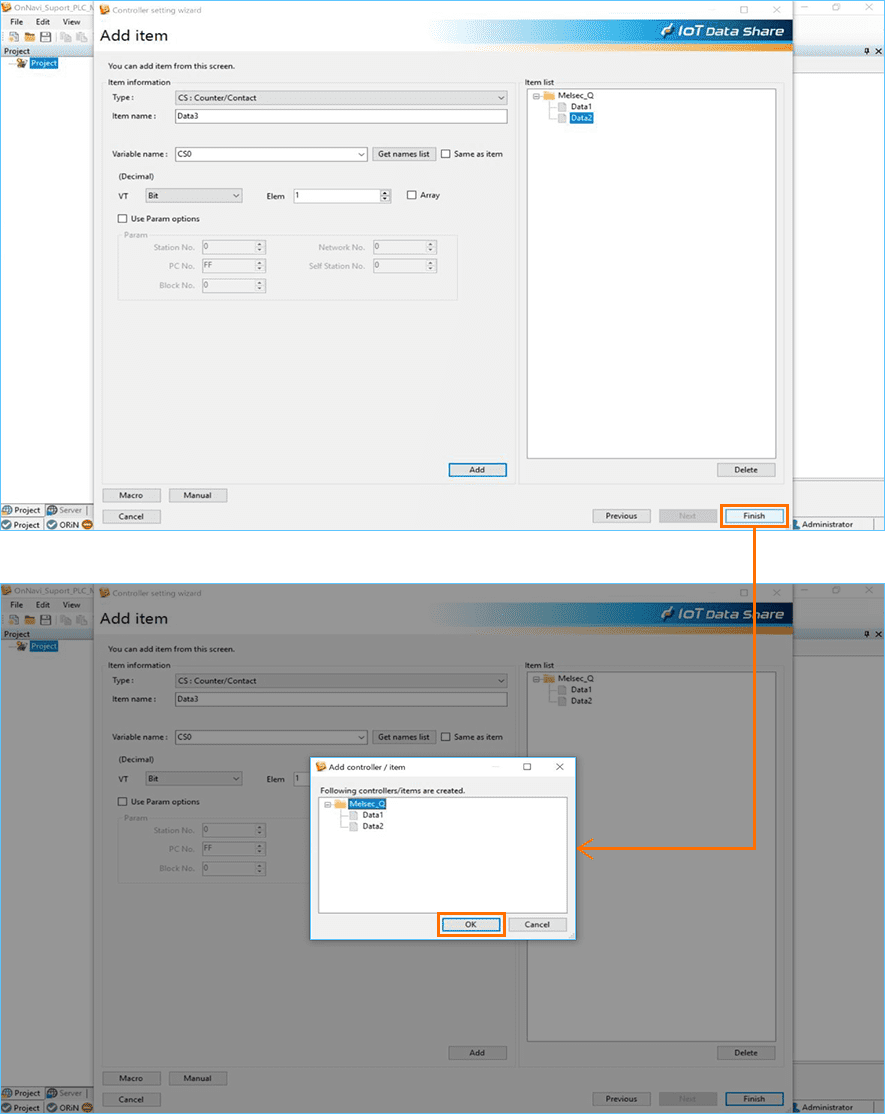
 Click the [Finish] button. Confirm the settings and click the [OK] button.
This completes "Item settings for retrieving data from MELSEC Q Series PLCs".
Step 2Confirm that data can be collected from equipment
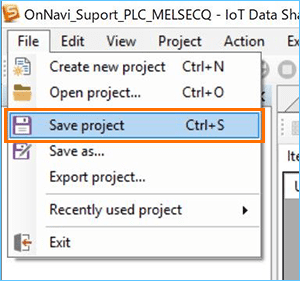
* For details on how to save and start a project, refer to Chapter 1 Lesson2 of <Learning contents> [Basics]
Select [Save project] from the [File] menu.
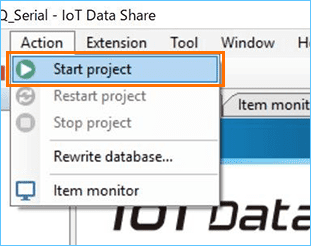
Select [Start project] from the [Action] menu.
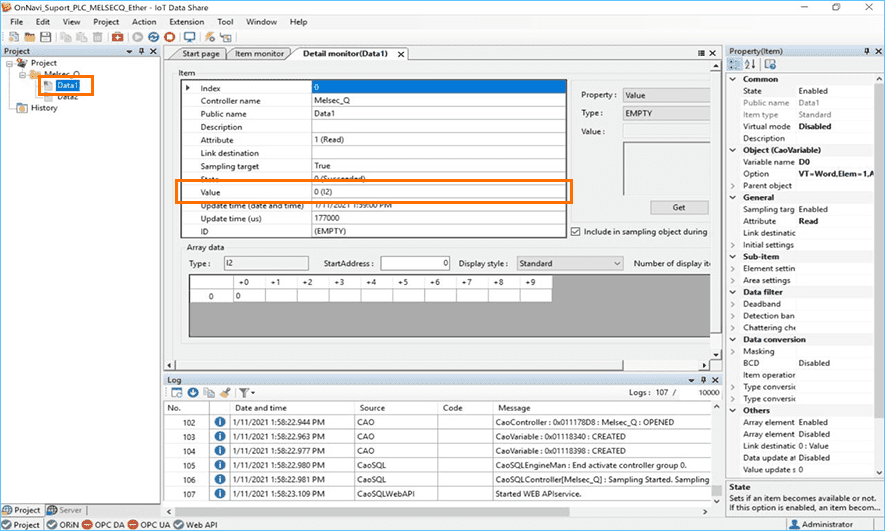
Verify that IoT Data Share is able to collect data.
Double-click the item "Data1" and check [Value] on the monitor screen that appears.
* The data displayed here is the value held in your equipment.
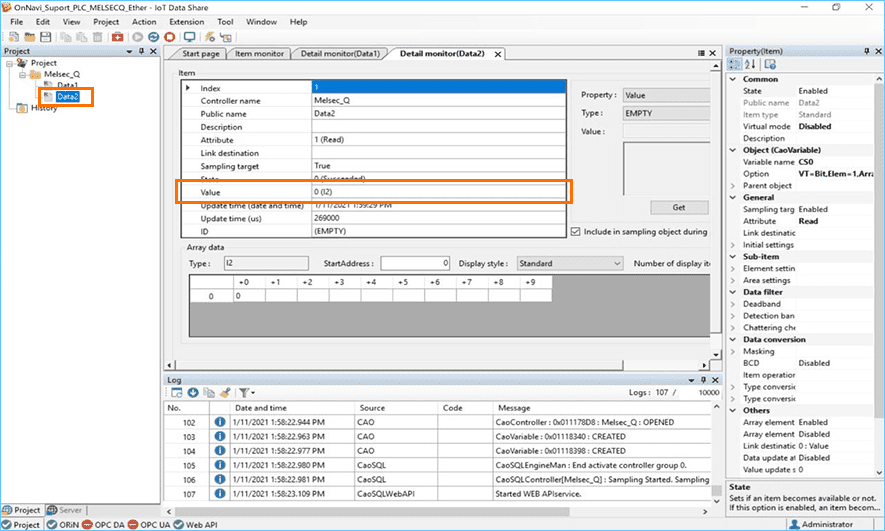
Next, double-click the item "Data2" and check [Value] on the monitor screen that appears.
●This completes the "How to connect to MELSEC Q series console via serial communication" procedure.