Introduction
support section

Outline
Generates a JSON string from the item data of equipment devices collected
by IoT Data Share on the PC, and sends the JSON string to Azure IoT.
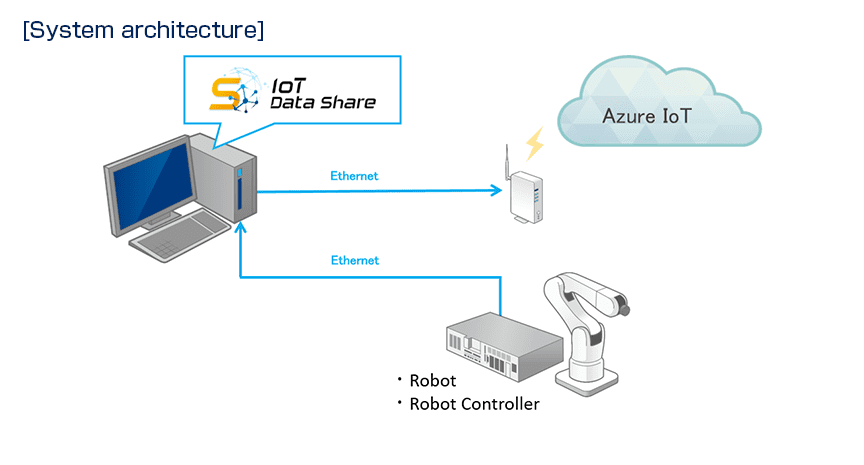
Equipment information of the connection destination
* To connect IoT Data Share to the equipment, use the settings in
Chapter 1, Lesson2 of <Learning contents> [Basics].
- Controller name : RC8
- Item name : I10
Destination Azure IoT Hub configuration and connectivity information
- IoT Hub (Subscription) : <Specify the subscription you are subscribing to>
- IoT Hub (Resource group) : Tutorial
- IoT Hub (Current location) : JAPAN West
- IoT Hub (IoT Hub name) : tutorial
- IoT devices (Device ID) : demo01
- Primary connection string : HostName=tutorial.azure-devices.net;DeviceId=demo01;SharedAccessKey=xxx
<SharedAccessKey is automatically generated>
IoT Data Share Settings Sent to Azure IoT Hub
- Controller name : AzureIoT
- Item name : telemetry
The following steps assume that the connection between your computer and Azure IoT Hub is already established.
Step 1Setting items to send to Azure IoT
 Select [Controller setting wizard] from the [Project] menu.
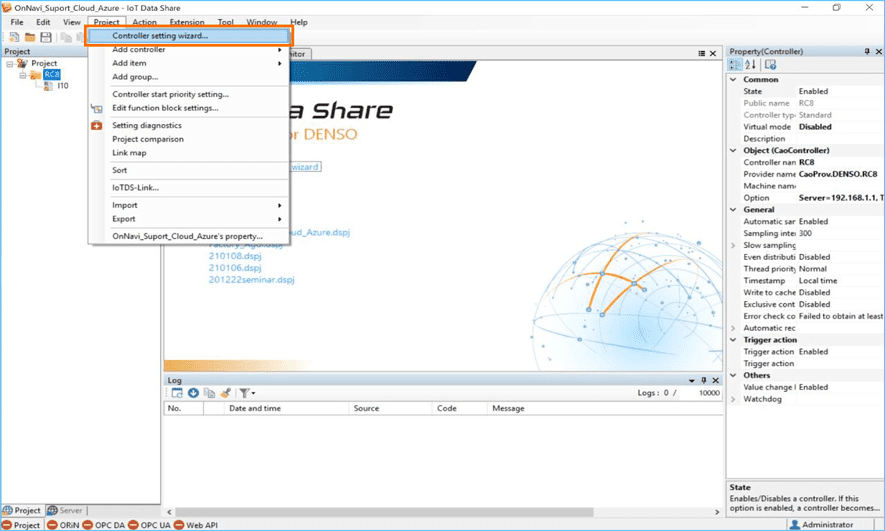
 First, setting up the controller.
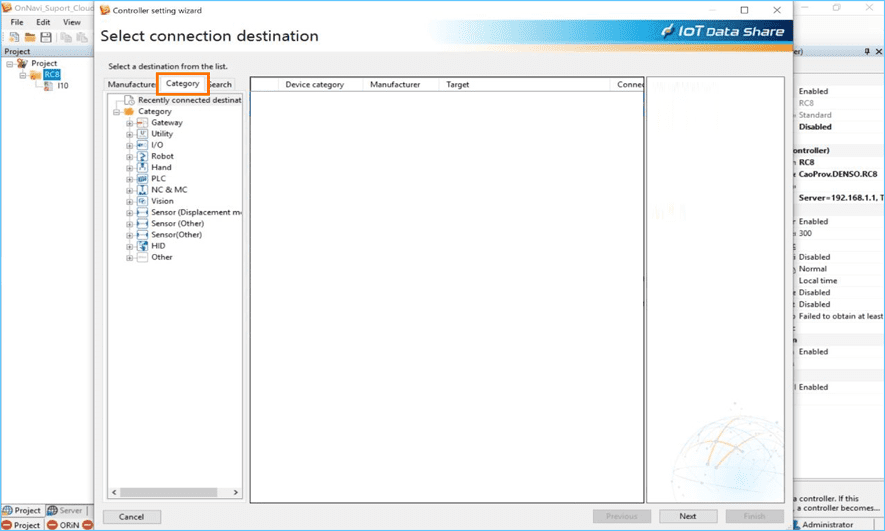
Select [Category] from the Search tab.
 Select [Category], [Gateway], and [Microsoft] from the search tree.
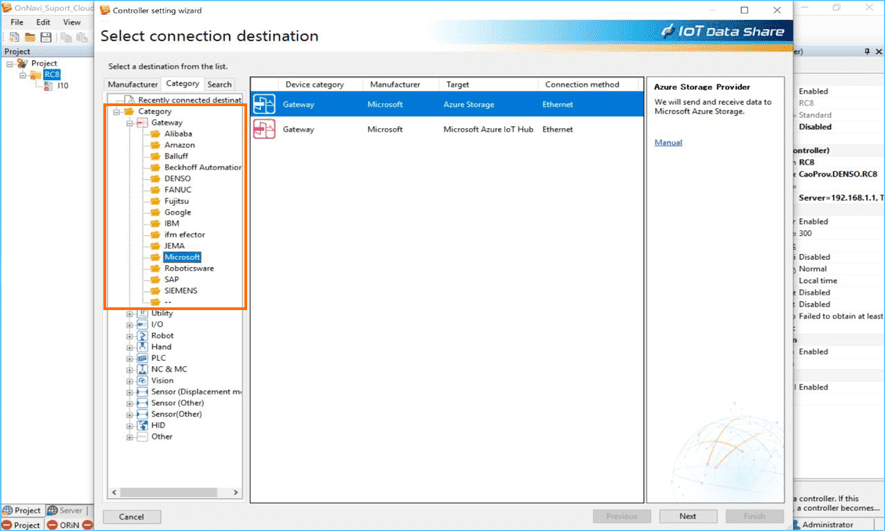
 Select [Microsoft Azure IoT Hub] from the list displayed.
After selecting, make sure that the displayed provider name is "Azure IoT Provider", and then click the [Next] button.

 Optionally set the controller name.
Here, enter "AzureIoT".
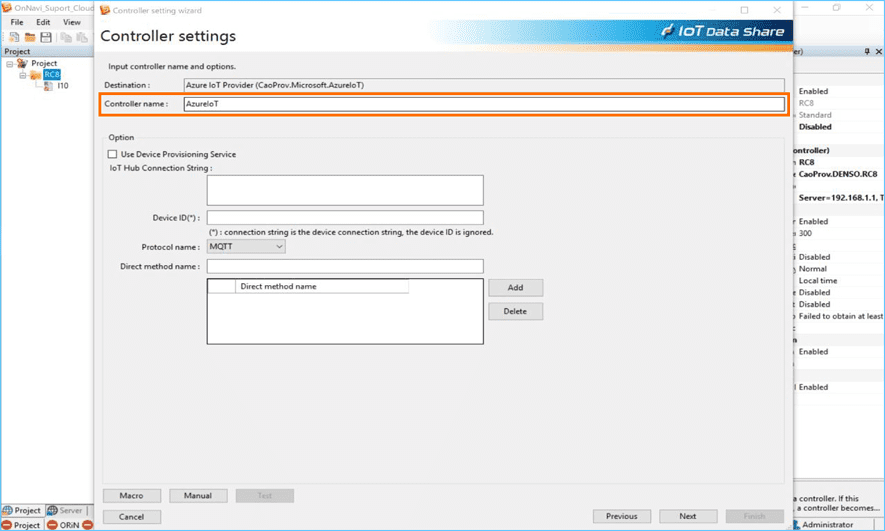
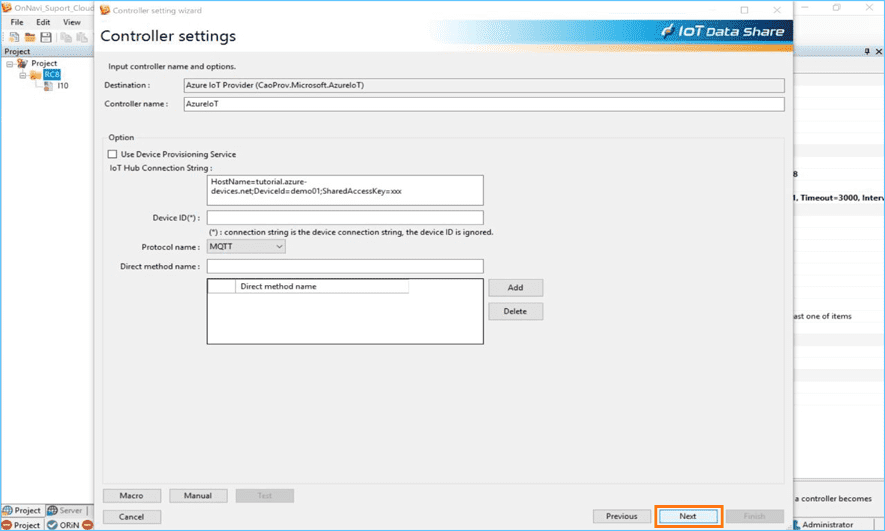
 Set the [IoT Hub Connection Text] in [Option].
Here, enter "HostName=tutorial.azure-devices.net;DeviceId=demo01;SharedAccessKey=xxx".

 Confirm the input items, and click the [Next] button.
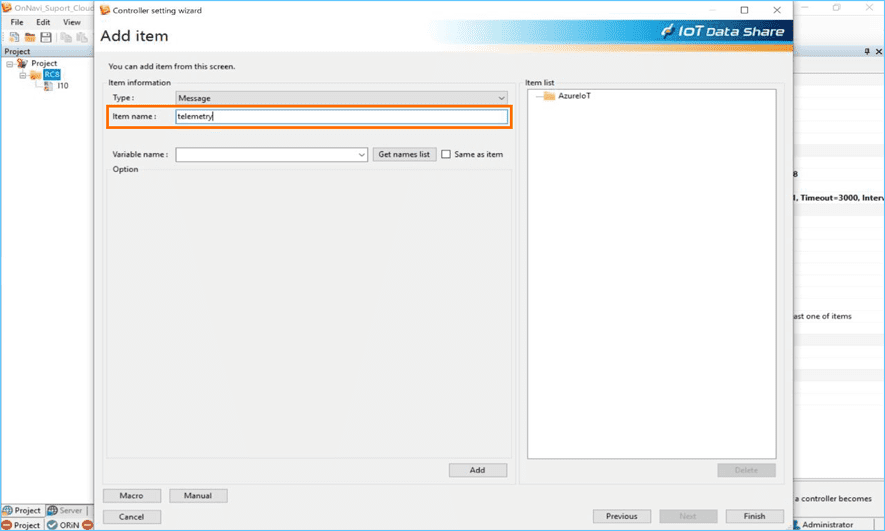
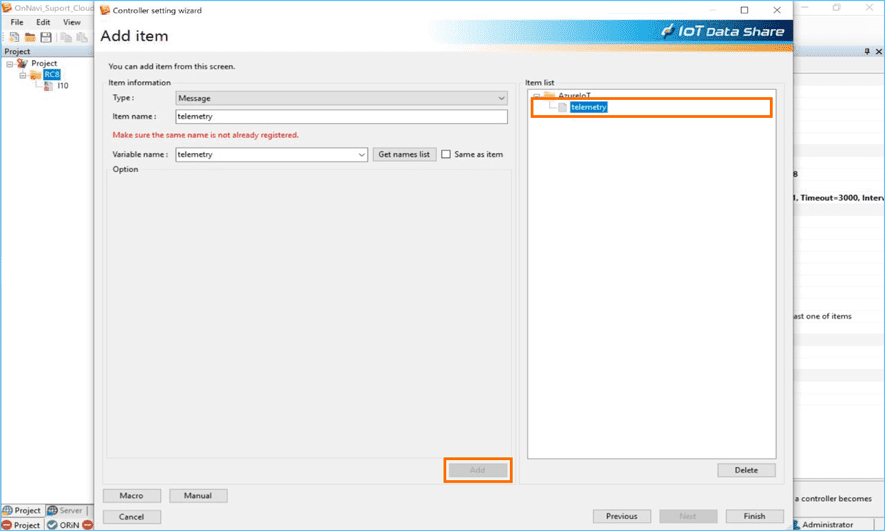
 Then add the item. Set [Item name] as desired.
Here, enter the item named "telemetry".
 Set the [Variable name].
Here, enter "telemetry".
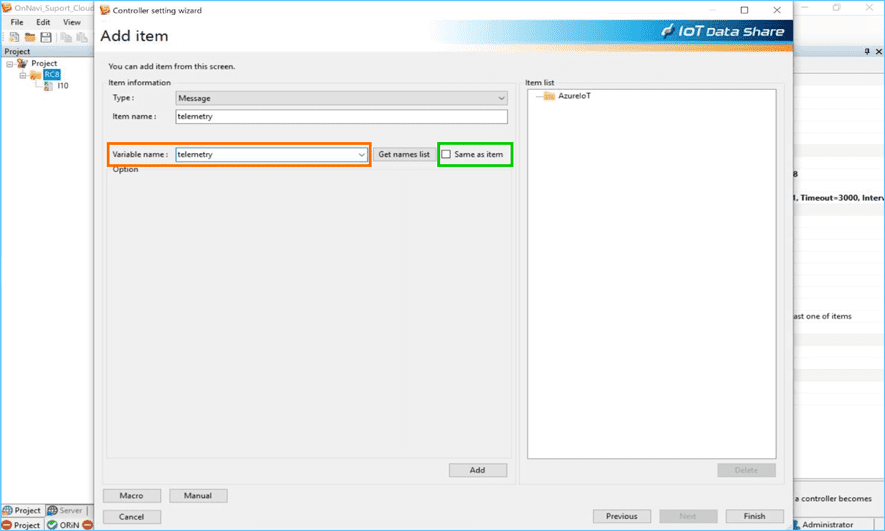
Note
If the [Same as item] check box is selected, the name entered in [Item name] can be set as [Variable name] without entering [Variable name].
 Click the [Add] button to confirm that the item has been added.
Note
To add multiple items, click the [Add] button, and then enter another item name to add.
 Click the [Finish] button. Confirm the settings and click the [OK] button.
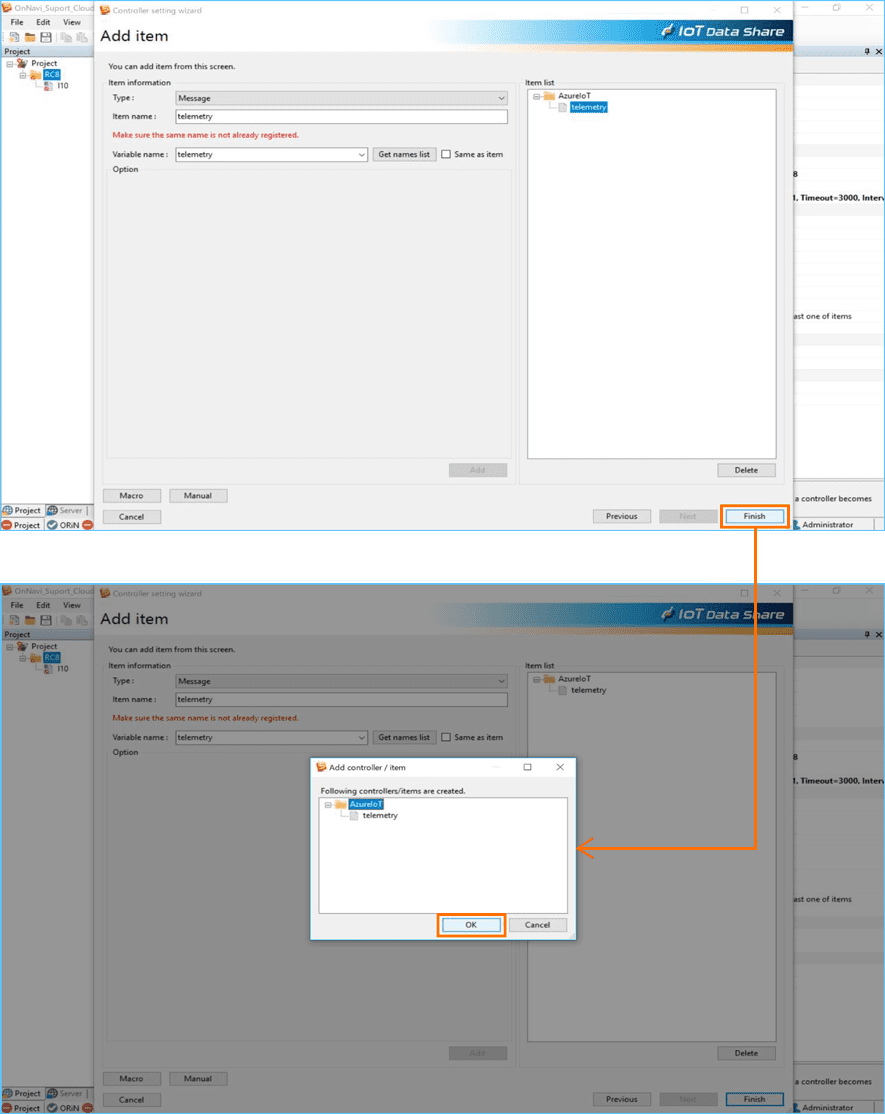
This completes the "Setting items to send to Azure IoT" procedure.
Step 2Setting of sending data to Azure IoT
To send data to Azure IoT, set the attribute of the send item "telemetry" and the trigger action of the data collection controller "RC8".
Select the item [telemetry] from the project tree,
and select [General] for [Property (Item)] or [Write] from the [Attribute] list.

Note
The initial value of the [Attribute] property when an item is added is "Read", but the initial value can be changed by the environment setting.
Select the controller [RC8] from the project tree,
and select [Trigger action setting] from the right-click menu.
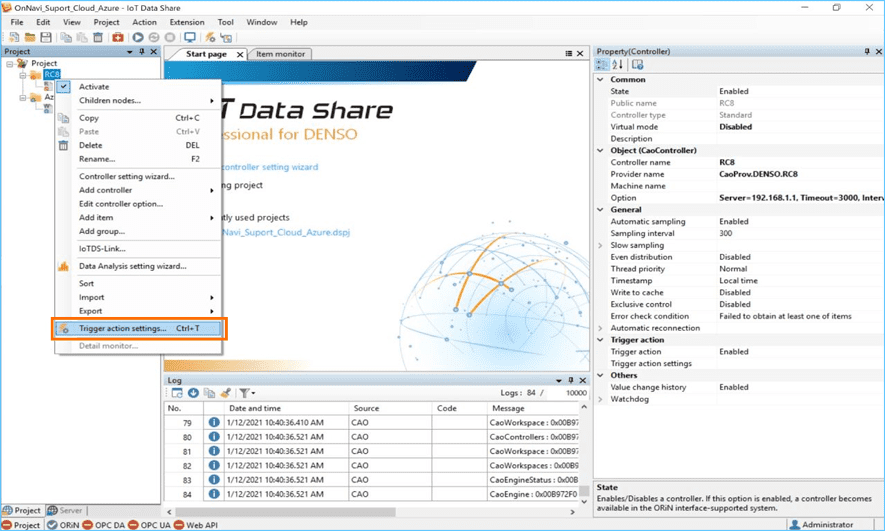
Note
In addition to the right-click menu,
you can also select the trigger action settings from the toolbar buttons.
Click the [Action] button.
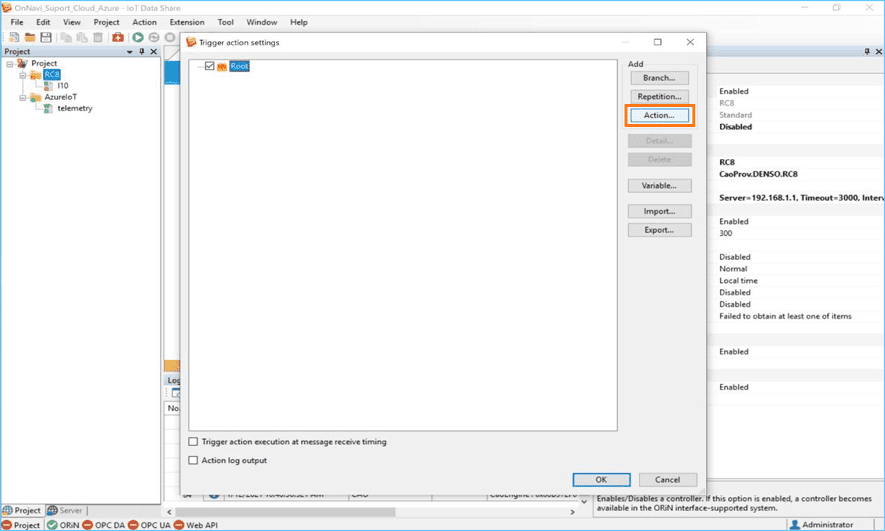
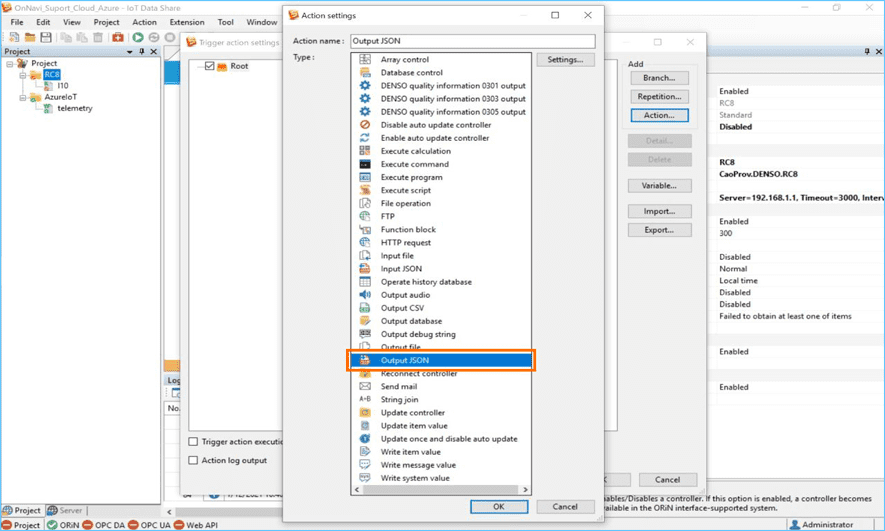
Select [Output JSON] from the Action List.
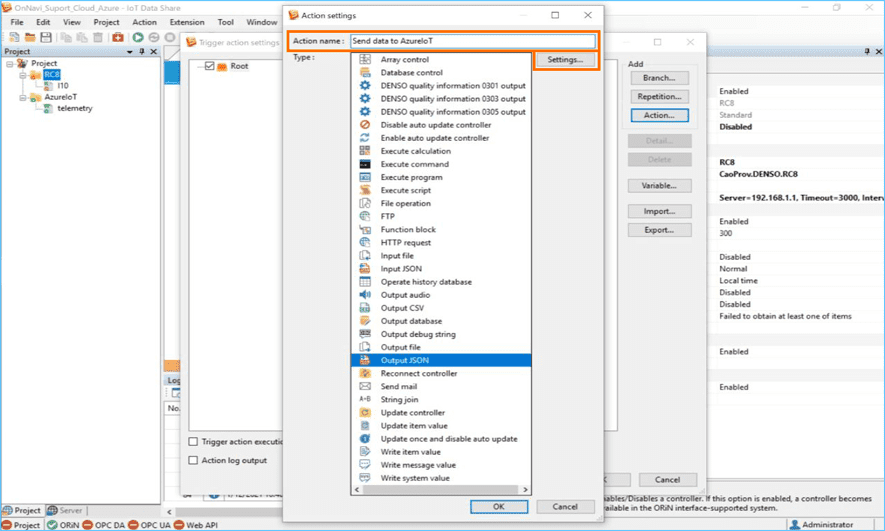
Set [Action name] as desired.
Here, enter "Send data to AzureIoT" and click the [Settings] button.
Note 1
When adding a trigger action, you can leave the action name as the default, but if you add multiple actions of the same type, they will have the same action name, so it is recommended to change it to any name you want.
Note 2
You can also open the settings screen for each action by double-clicking the selected action.
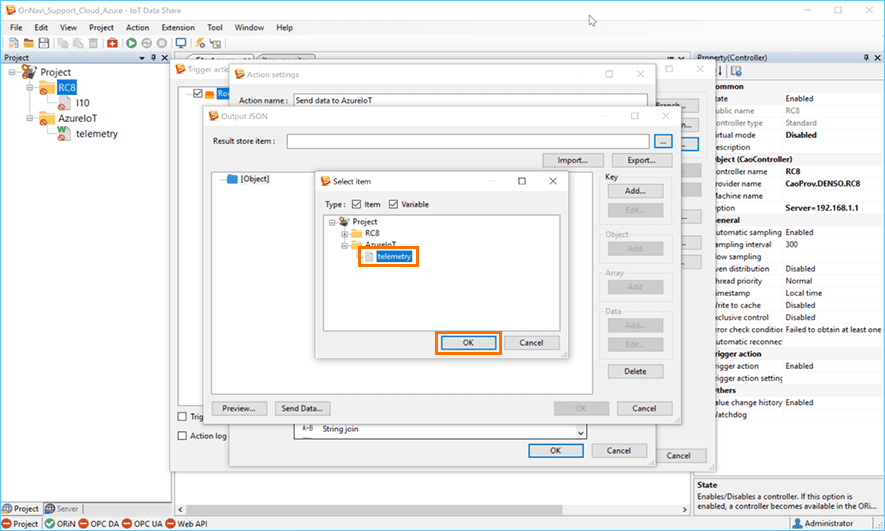
Select [Result storage item].
Click the [...] button to open the settings window.

Select the item [telemetry] and click the [OK] button.
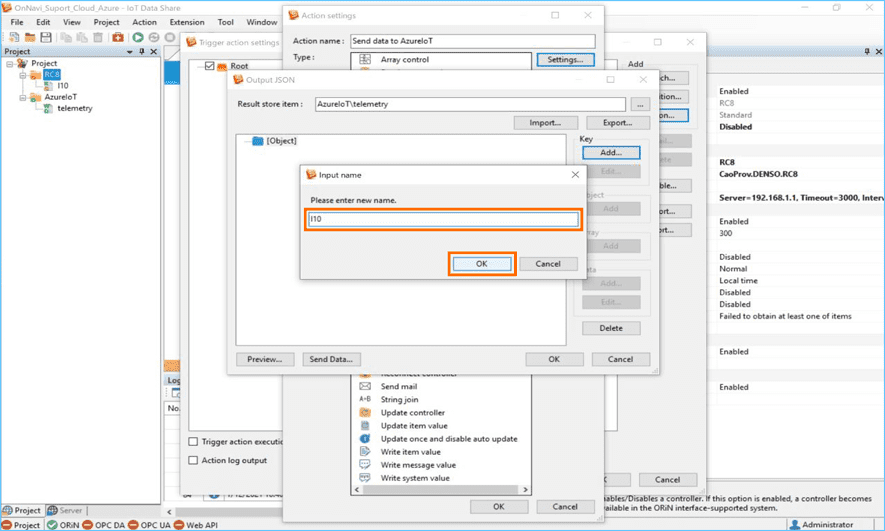
Add [Object], and click the [Add] button for [Key].
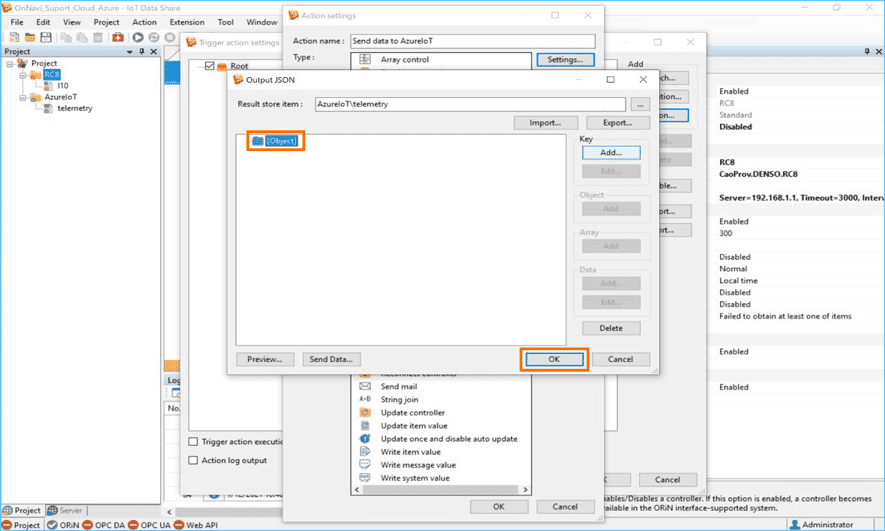
Set the Key name as desired.
Here, enter "I10" and click the [OK] button.
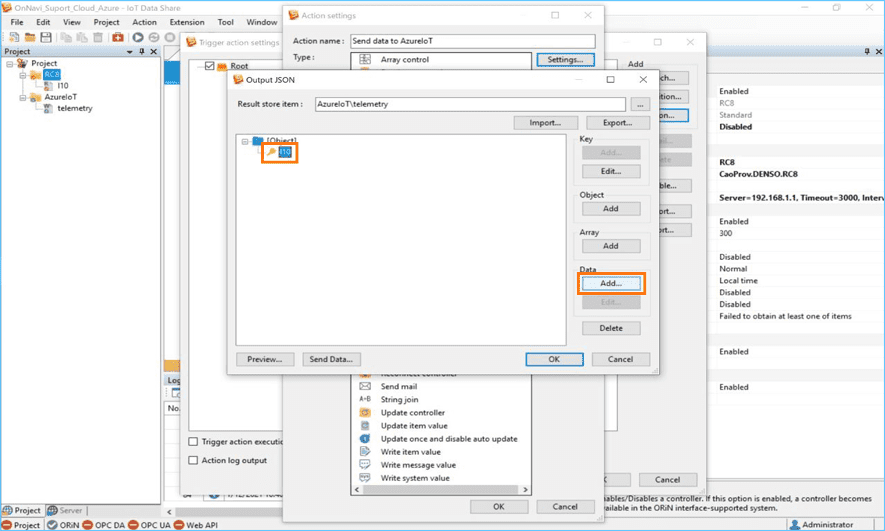
Select the added Key [I10] and click [Add] in [Data].
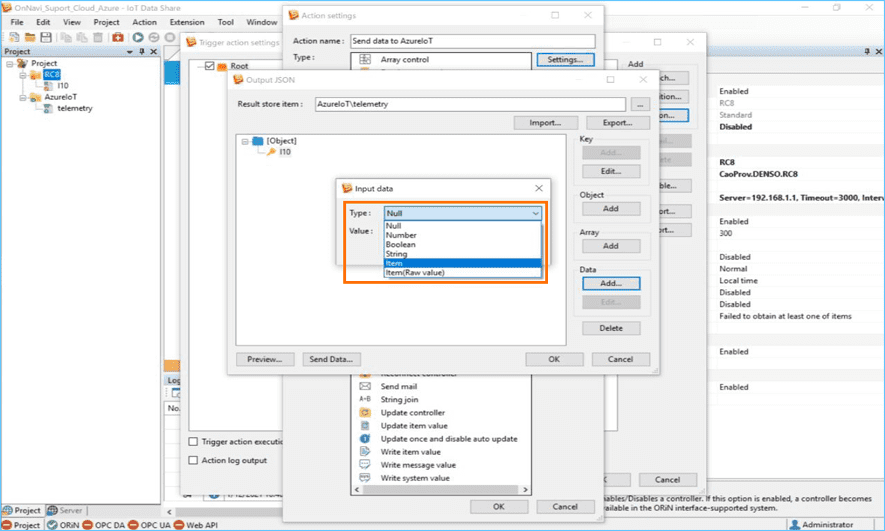
[Type] Select [Item] from the list.
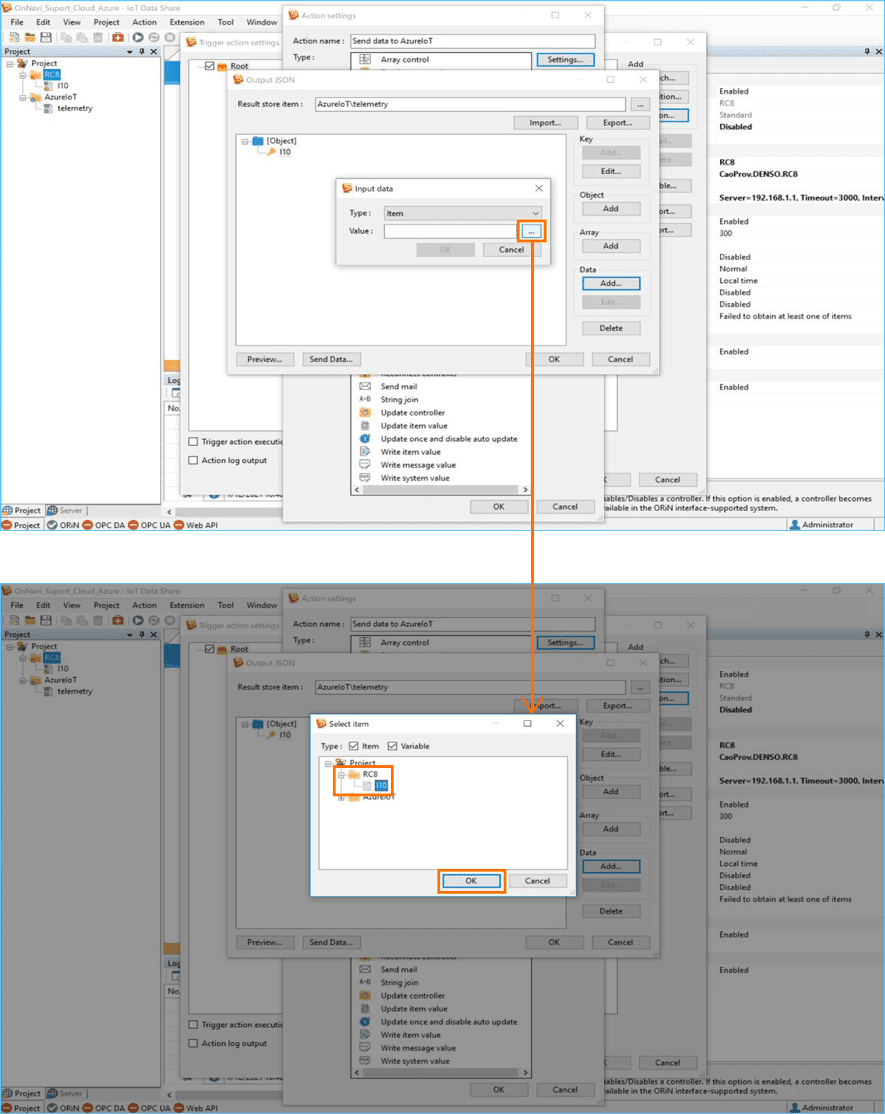
 Click the [...] button and select [I10] for the controller [RC8] item.
Click the [OK] button.
 Check the setting items, and click the [OK] button.
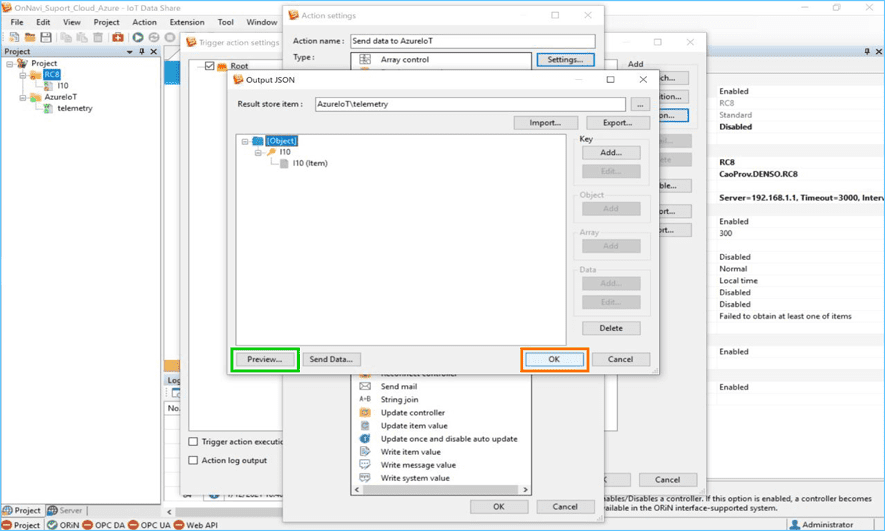
Note
You can check JSON to be sent by clicking the [Preview] button.
This completes the "Setting of sending data to Azure IoT" procedure.
Step 3Checking the data sent to Azure IoT
* For details on how to save and start a project, refer to Chapter 1 Lesson2 of <Learning contents> [Basics]
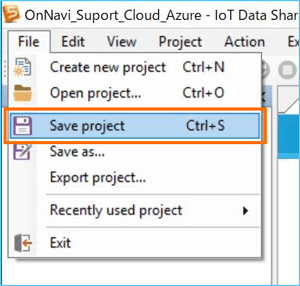
Select [Save project] from the [File] menu.
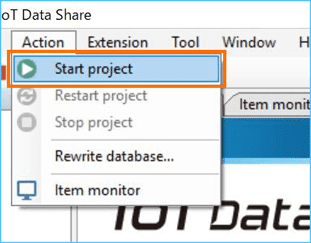
Select [Start project] from the [Action] menu.
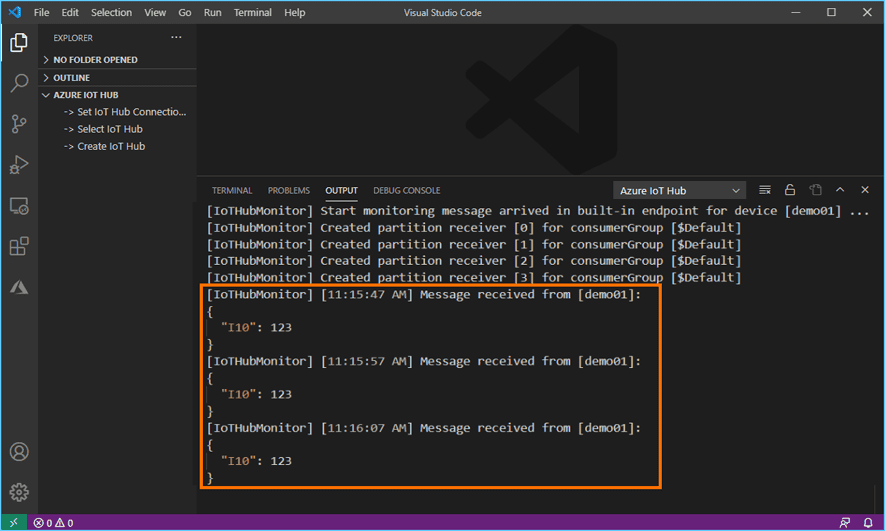
Verify the data sent to Azure IoT.
* Here we are using a Microsoft Visual Studio Code that adds an extension (Azure IoT Hub) to the validation.
●This completes the "How to send data to Azure IoT" procedure.