Introduction
support section

Outline
The data (data, time) of the equipment collected by IoT Data Share on the PC is saved in the CSV file.
![[System architecture]IoT Data Share →(Ethernet)→ Microsoft SQL Server Robot, Robot Controller →(Ethernet)→ IoT Data Share](../../assets/images/s1_c/contents_0004/contents_0004_overview.png)
Equipment information of the connection destination
* To connect IoT Data Share to the equipment, use the settings in
Chapter 1, Lesson2 of <Learning contents> [Basics].
- Controller name : RC8
- Item name : I10
File storage information
- File name : CSV_Sample
- Save destination : C:\OnlineNavigator\CSV_Output
- Header : Item_value
- Number of lines to output (number of records) : 1000
- After data output : Stop writing
Step 1Setting up data registration in CSV files using trigger actions
 Select a controller to which you want to add the trigger action.
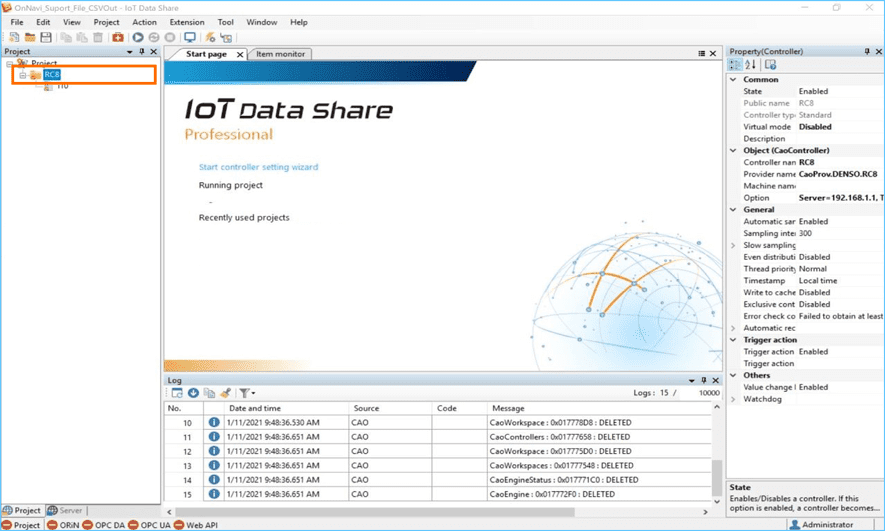
 Select [Trigger action settings] from the right-click menu.
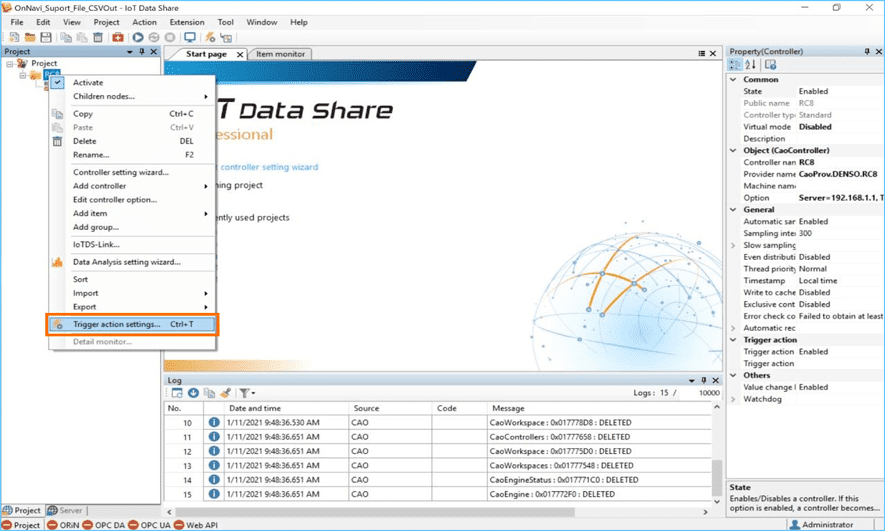
Note
In addition to the right-click menu, you can also select the trigger action settings from the toolbar buttons.
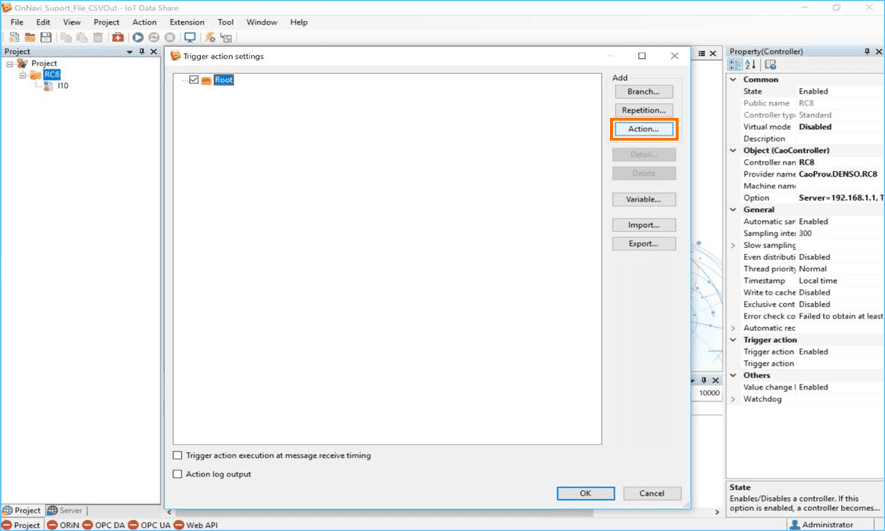
 Click the [Action] button.
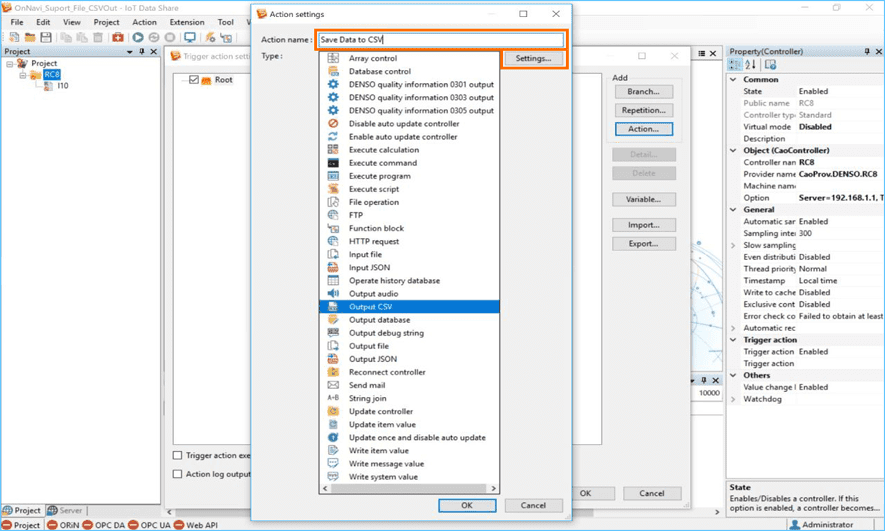
 Select [Output CSV] from the action list.
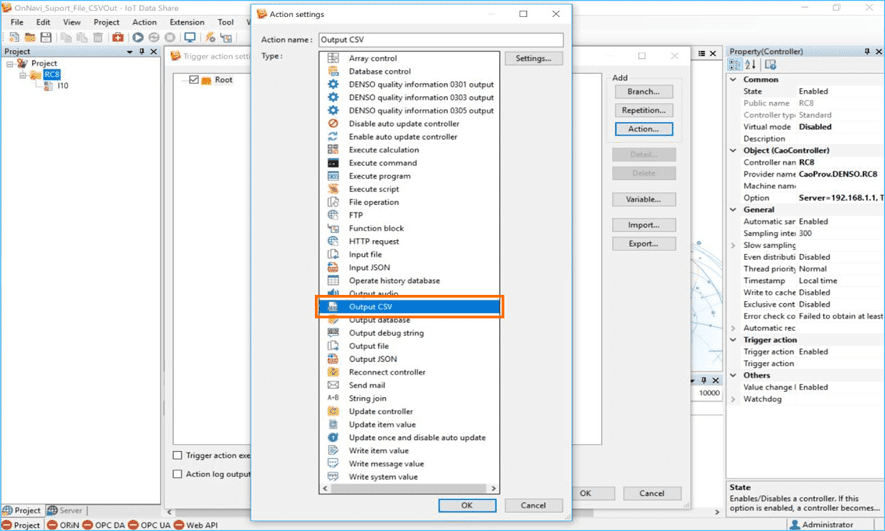
 Set [Action name] as desired.
Here, enter "Save Data to CSV", and click the [Settings] button.
Note 1
When adding a trigger action, you can leave the action name as the default, but if you add multiple actions of the same type, they will have the same action name, so it is recommended to change it to any name you want.
Note 2
You can also open the settings screen for each action by double-clicking the selected action.
 Set [Folder].
Click [...] and select "C:\OnlineNavigator\CSV_Output" from the displayed folder list.
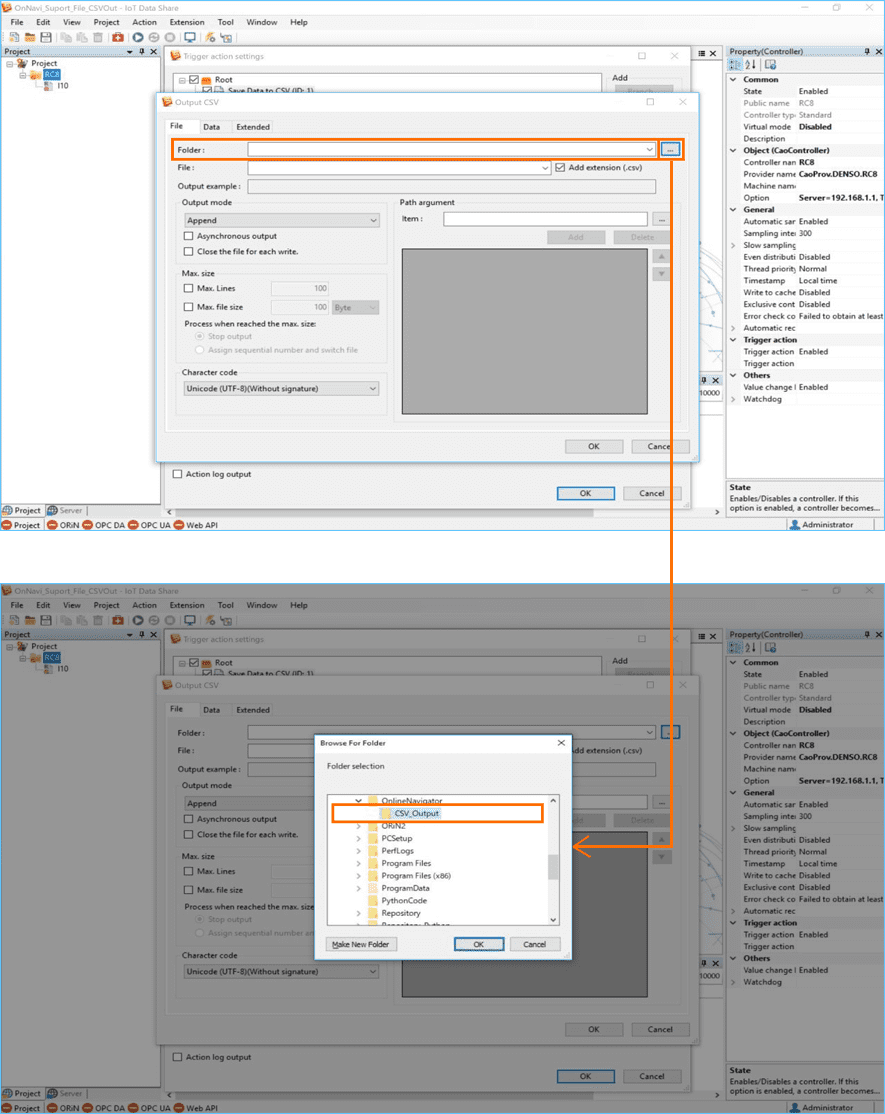
Note 1
If you want to specify a location that requires administrator privileges as the destination of the [Folder], start IoT Data Share with administrator privileges.
Note 2
When IoT Data Server is used, the folder created below from "E:\User\Share" can be specified as the destination of [Folder].
 Set [File] as desired.
Here, enter "CSV_Sample".
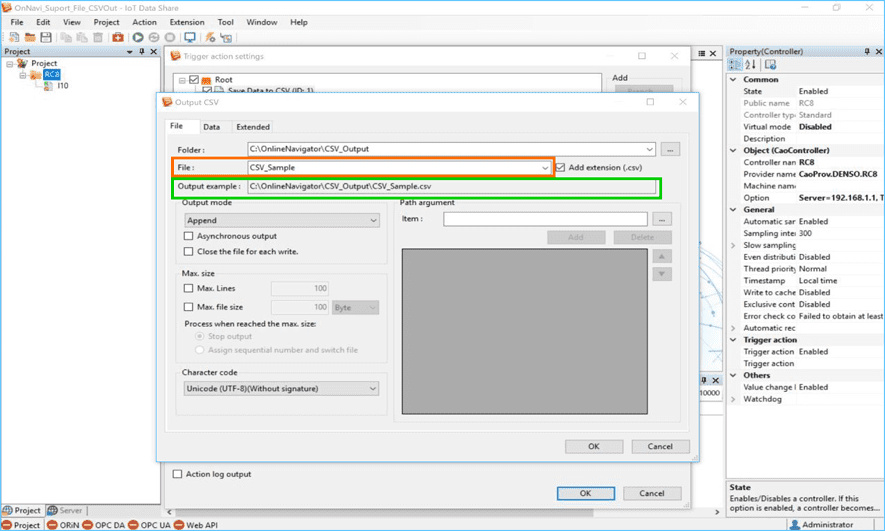
Note 1
After setting [Folder] and [File], you can check the location and file name to be saved in [Output example] in the path.
Note 2
Folders and files set for [Folder] and [File] are created automatically if they do not exist.
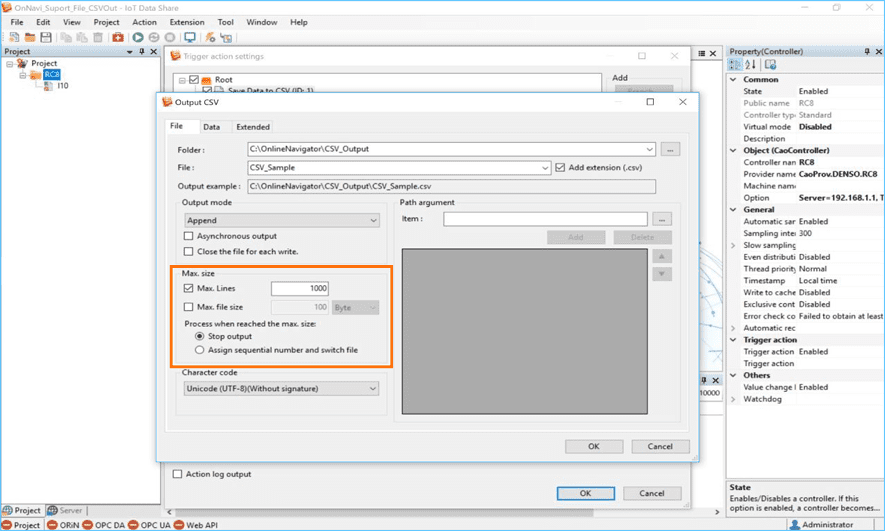
 In [Max. size], set [Max. Lines] and [Process when reached the max. size].
Here, set "1000" and "Stop output".
 Double-click "I10" from the [Data] tab tree to open the setting screen.
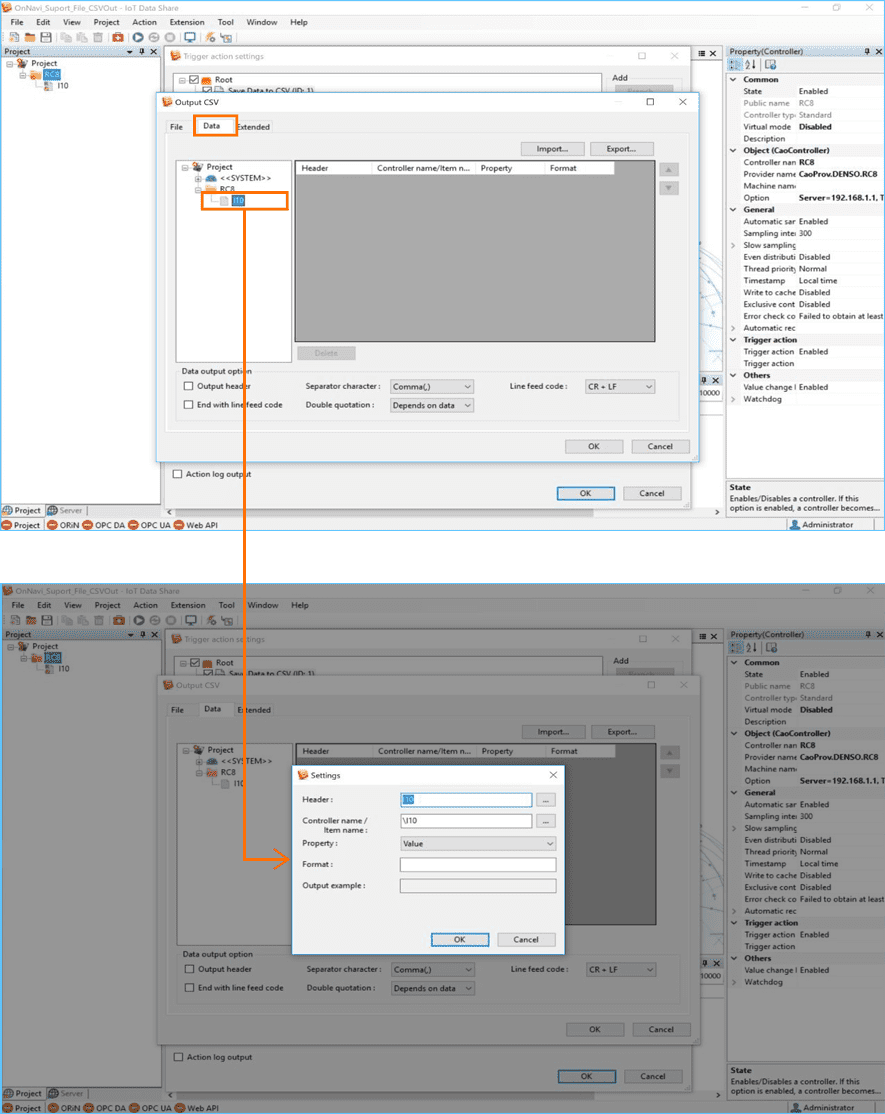
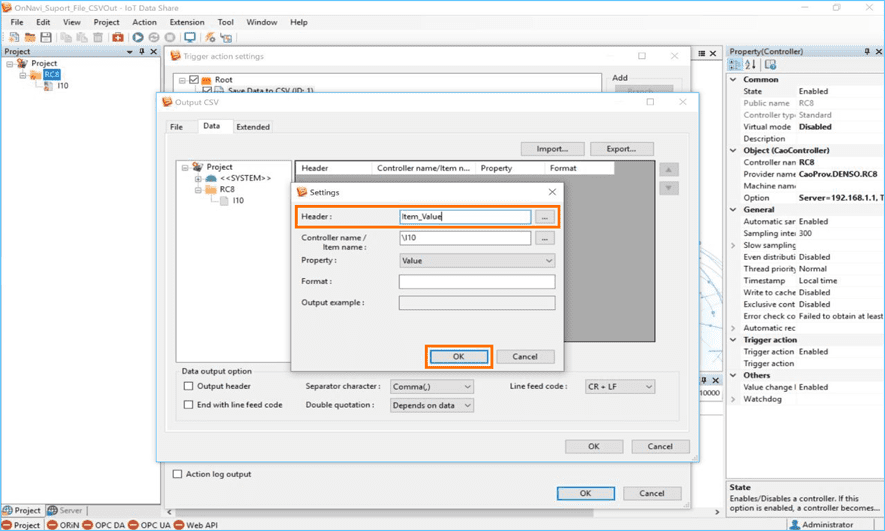
 Set items in [Header].
Here, enter the item "Item_value" and click the [OK] button.
Note
Set [Controller name / Item name] in the format "Controller name\Item name".
If the item to be set belongs to the controller for which trigger action is set, "Controller name" is omitted.
Step 2Checking the data saved in the CSV file
* For details on how to save and start a project, refer to Chapter 1 Lesson2 of <Learning contents> [Basics]
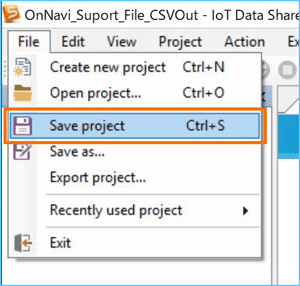
Select [Save project] from the [File] menu.
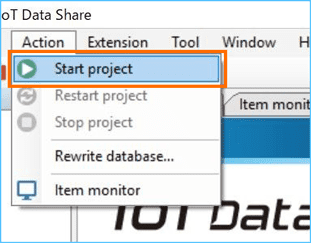
Select [Start project] from the [Action] menu.
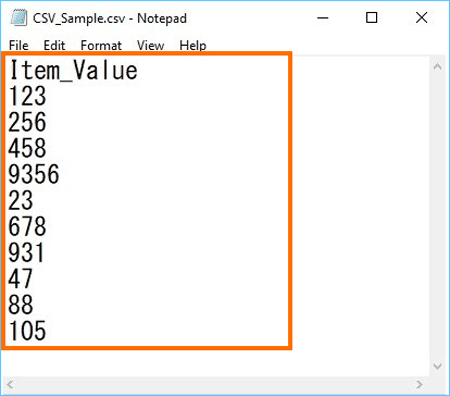
Make sure that the CSV file "CSV_Sample.csv" is generated in "C:\OnlineNavigator\CSV_Output" folder.
Open the file and make sure that the data is saved.
* Here, windows standard "Notepad (notepad.exe)" is used for checking the data.
●This completes the "How to save data to a CSV file" procedure.