Introduction
support section

Outline
Links the items of facility equipment to be collected by IoT Data Share on the PC
to the items to be transmitted on MQTT, and sends the data values to MQTT Broker.
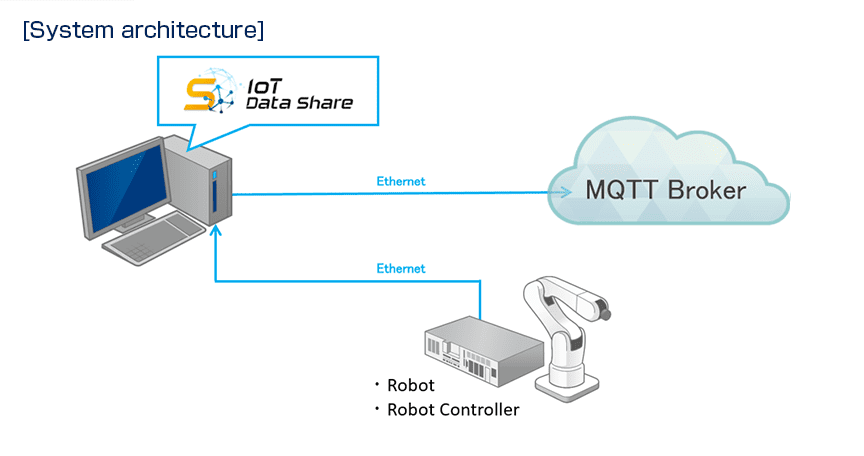
Equipment information of the connection destination
* To connect IoT Data Share to the equipment, use the settings in
Chapter 1, Lesson2 of <Learning contents> [Basics].
- Controller name : RC8
- Item name : I10
Destination MQTT Broker and send information
- IP address : 192.168.1.100
- Port number : 1883
IoT Data Share settings sent to MQTT Broker
- Controller name : MQTT_Pub
- Item name : Send_Topic
- Topic : /Factory/Japan/Tokyo/Robot
- QoS : 0
- Data type : String
The following configuration steps assume that you have established a MQTT Broker connectivity with your computer.
Step 1Item settings for sending data to MQTT Broker
 Select [Controller setting wizard] from the [Project] menu.
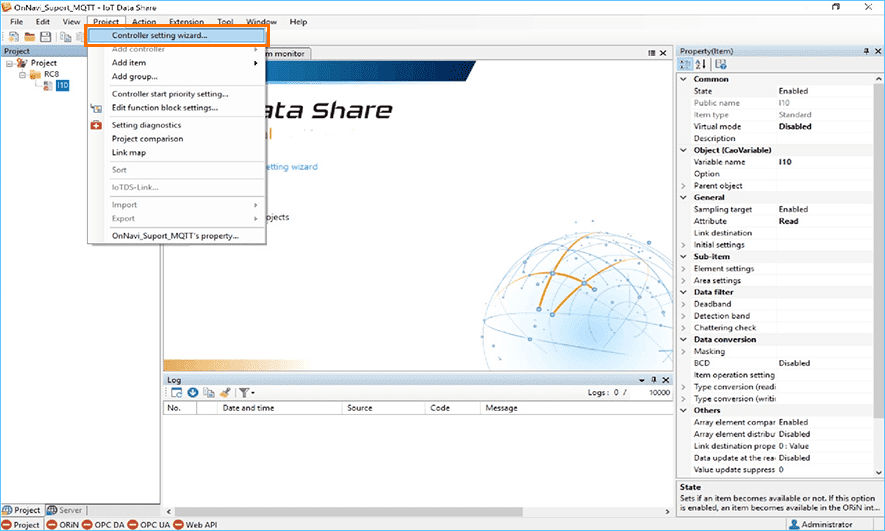
 First, setting up the controller.
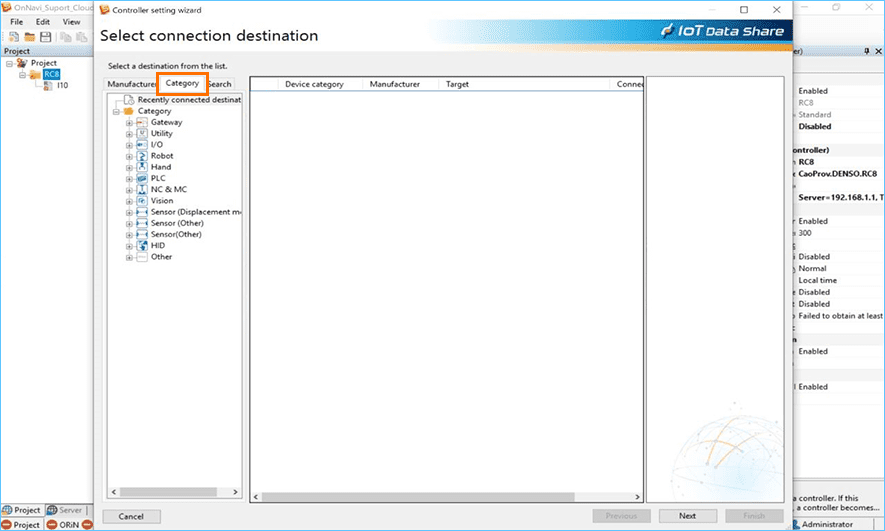
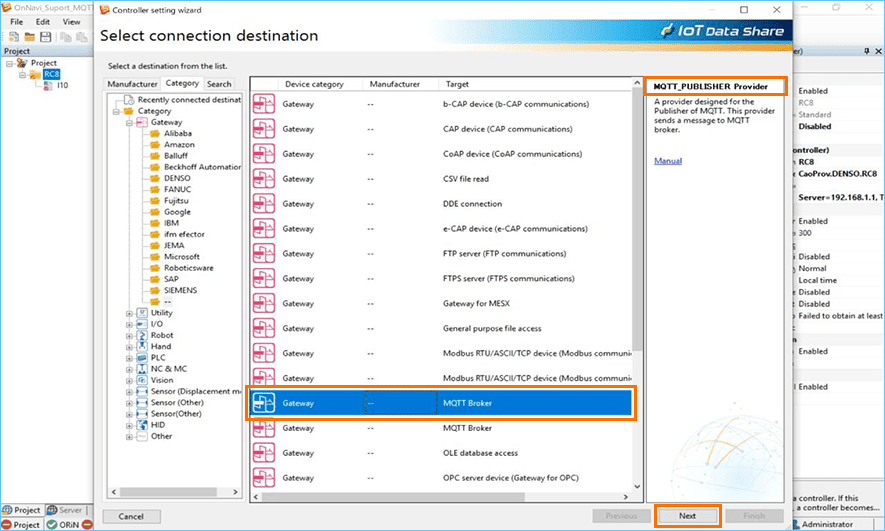
Select [Category] from the Search tab.
 Select [Category], [Gateway], and [--] from the search tree.
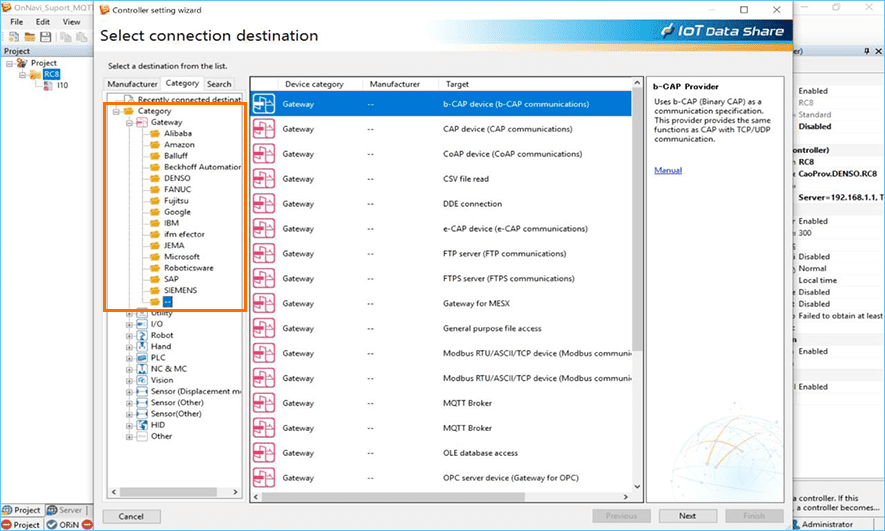
 Select "MQTT Broker" from the list displayed. After selecting, make sure that
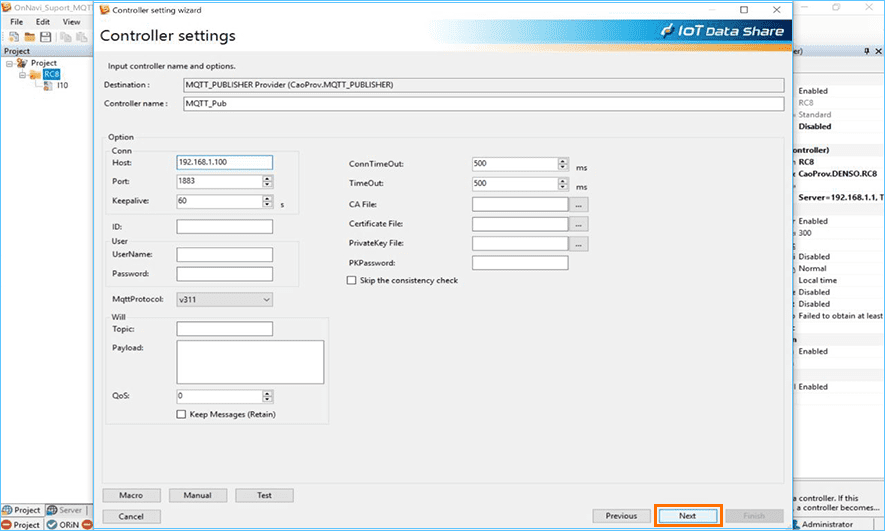
the displayed provider name is "MQTT_PUBLISHER Provider", and then click the [Next] button.
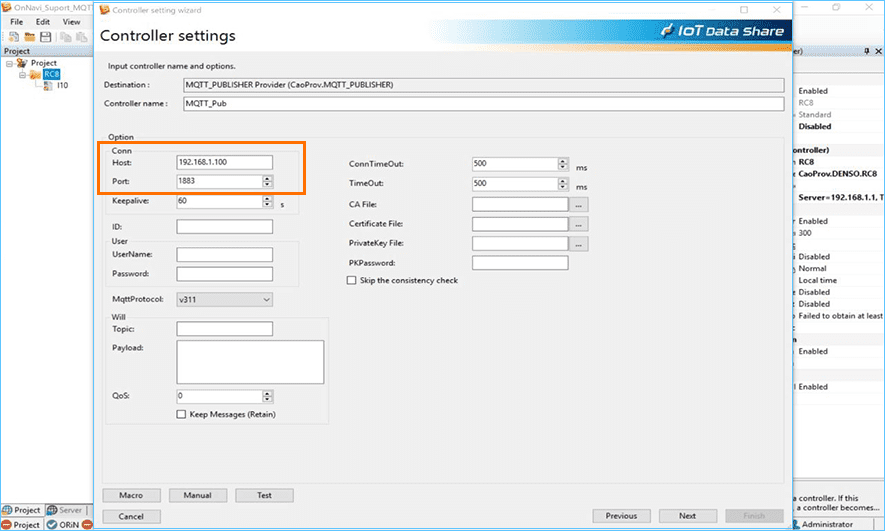
 Optionally set the controller name.
Here, enter "MQTT_Pub".

 Set [Host] and [Port] in [Option].
Here, enter the host name "192.168.1.100" and port number "1883".
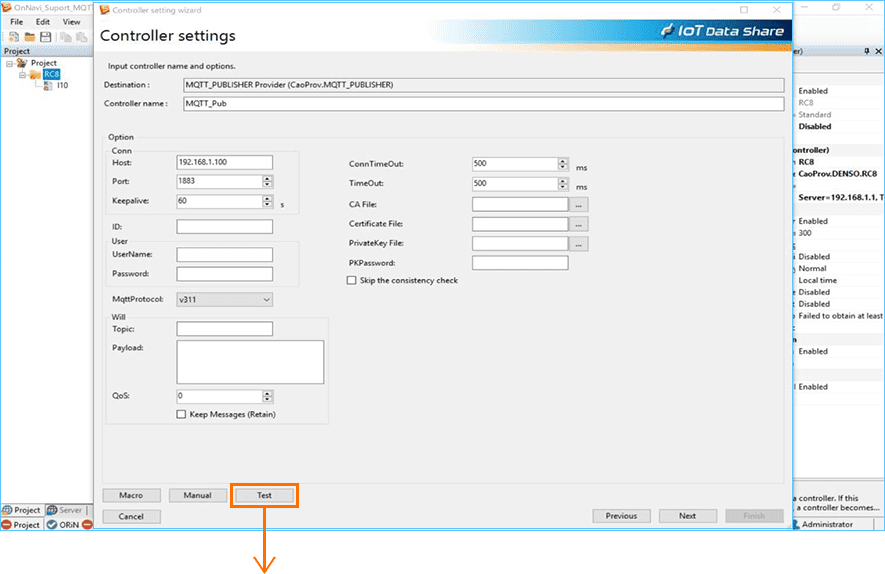
 Click the [Test] button.
* Confirm the connectivity with MQTT Broker.
Note
In addition to the IP address,
you can also enter the name of the host in [Host].
Note
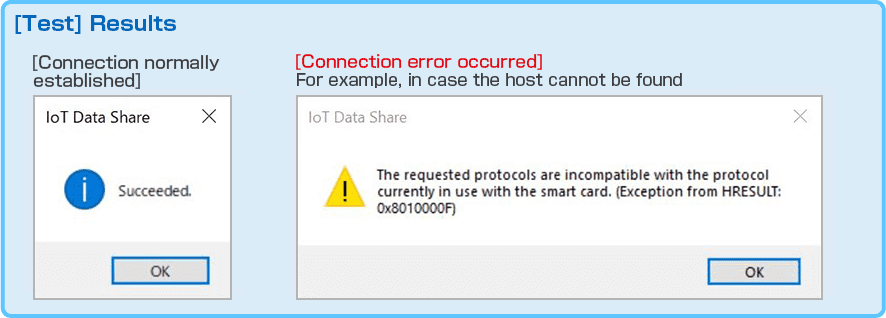
Typical MQTT Broker connectivity failures
- Cannot find the broker.
- Wrong broker IP address.
- Wrong broker host name.
- Wrong user name or password.
etc.
 Confirm the input items, and click the [Next] button.
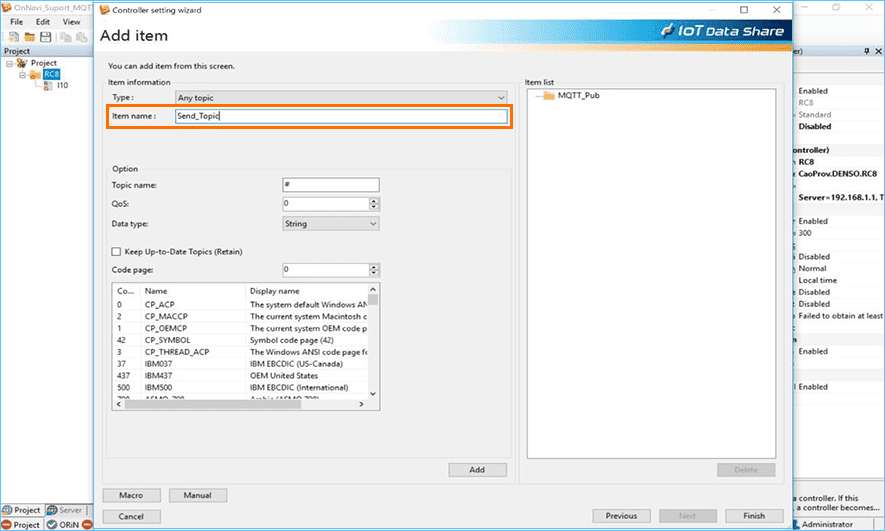
 Then add the item. Set [Item name] as desired.
Here, enter the item name "Send_Topic".
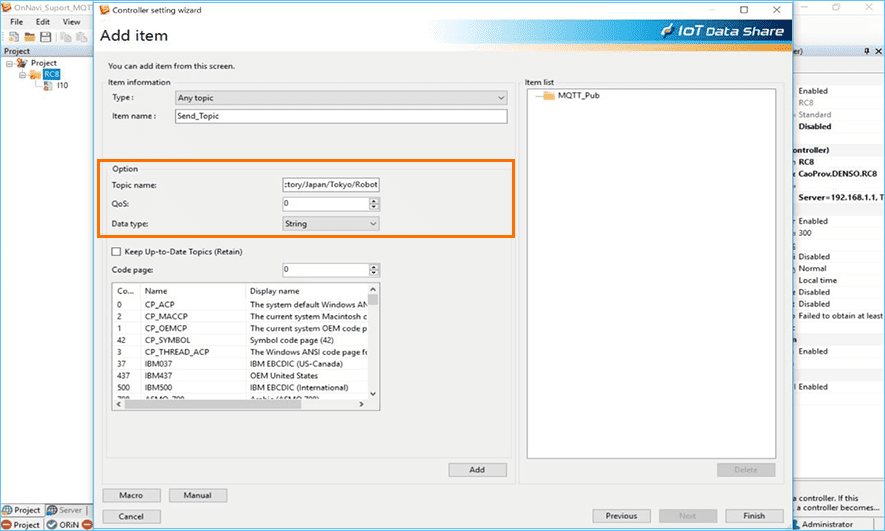
 Set [Topic name], [QoS], and [Data type] in [Option].
Here, enter the topic name "/Factory/Japan/Tokyo/Robot", QoS "0",
and select "Text" from the [Data type] list.
 Click the [Add] button to confirm that the item has been added.
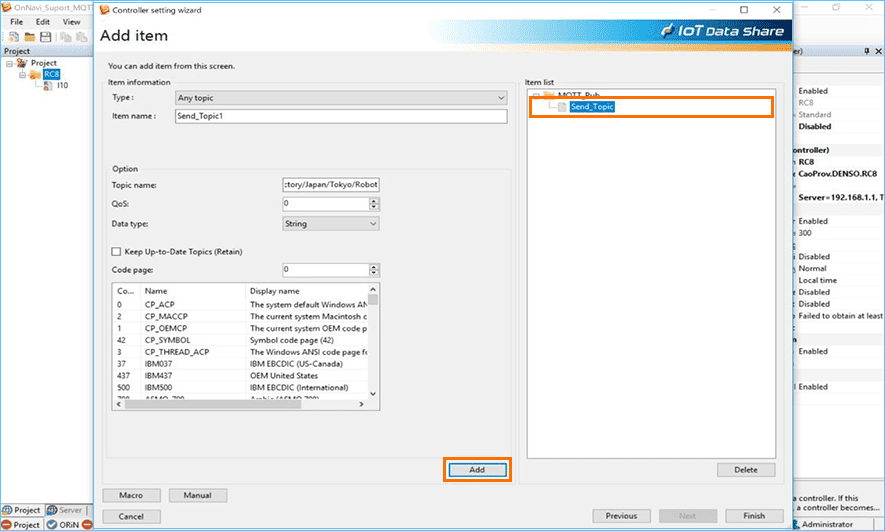
Note
To add multiple items, click the [Add] button, and then enter another item name to add.
 Click the [Finish] button. Confirm the settings and click the [OK] button.
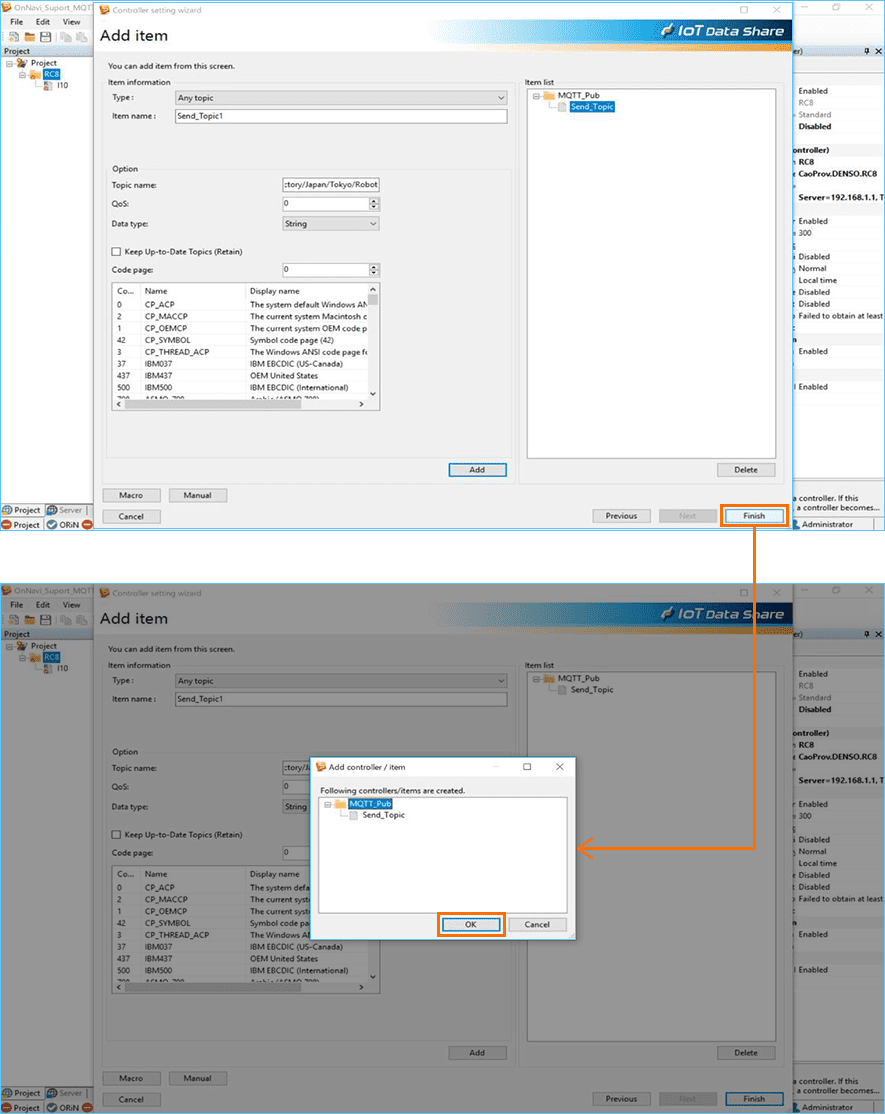
This completes the "Item Settings for Sending Data to MQTT Broker".
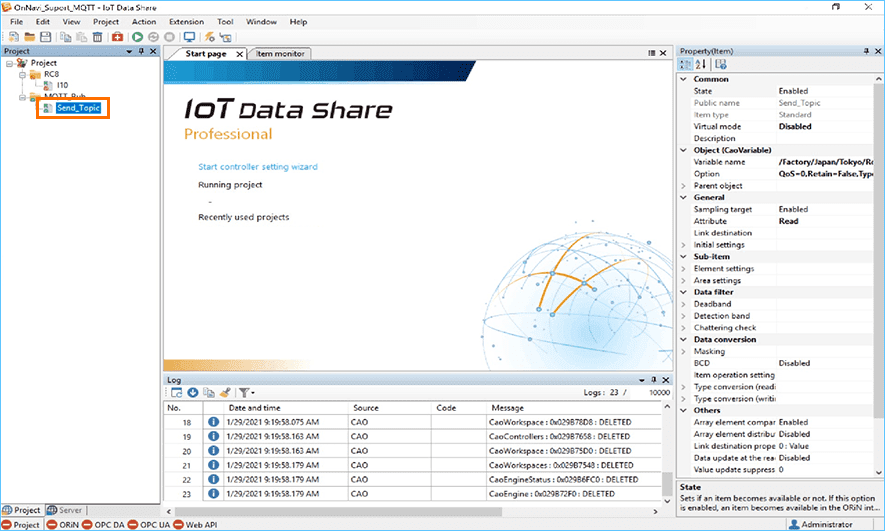
Step 2Setting Up Sending Data to MQTT Broker
In order to send data to MQTT Broker, the attribute of the sending item "Send_Topic"
and the link of the collection item "I10" are set.
Select the item "Send_Topic" to be sent to MQTT Broker added in Step1.
Select "Write" from the [General] and [Attribute] lists in [Property (Item)].
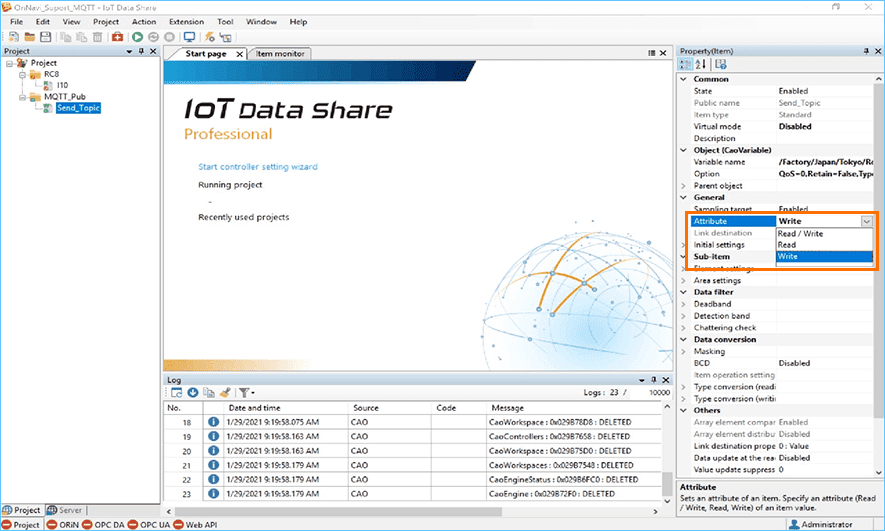
Note
The initial value of the [Attribute] property when an item is added is "Read", but the initial value can be changed by the environment setting.
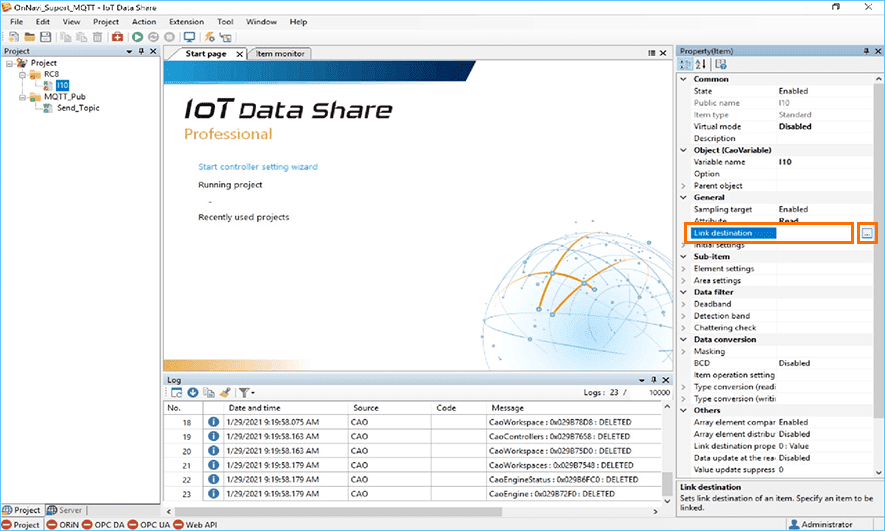
Select the item "I10" from the project tree.
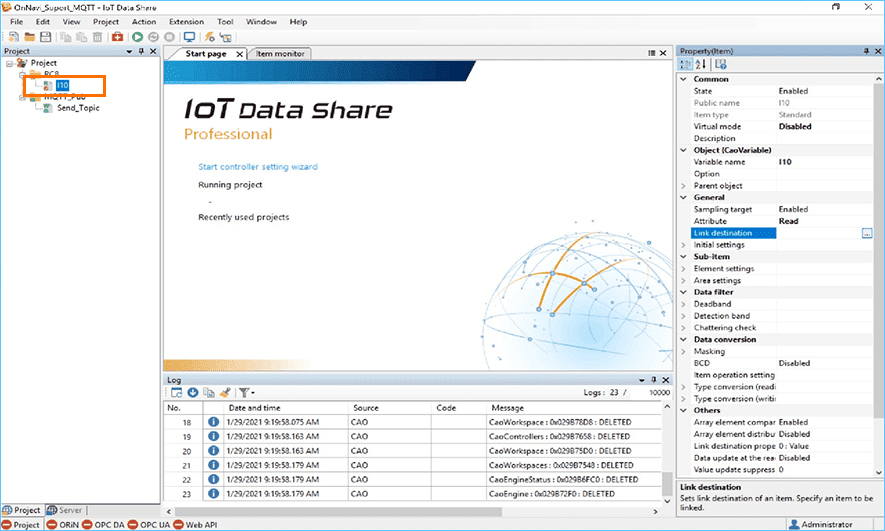
Click the [...] button of [Link destination] in [Property (Item)].
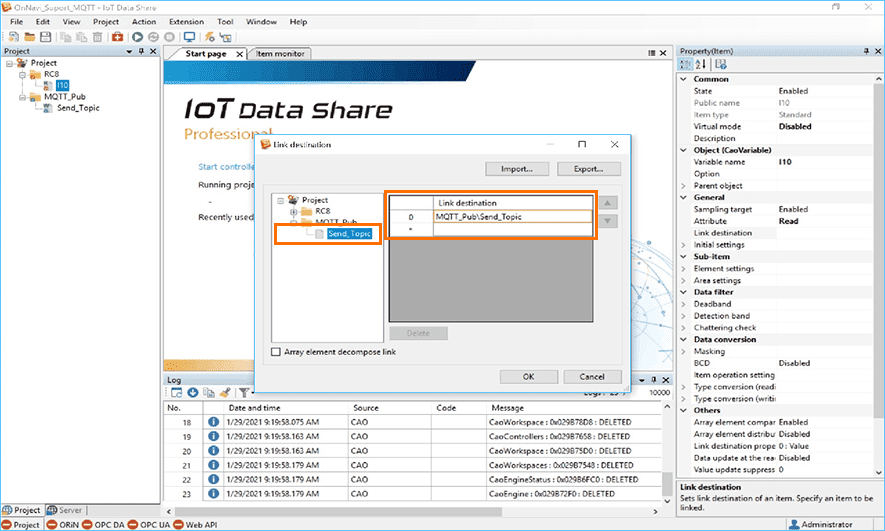
Double-click the item "Send_Topic" from the tree,
and confirm that "MQTT_Pub\ Send_Topic" is added to [Link destination].
Check the setting items, and click the [OK] button.
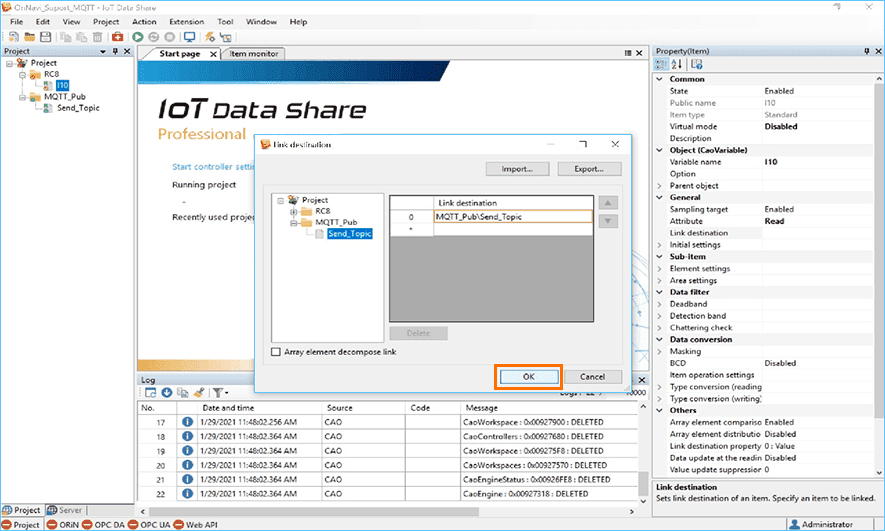
This completes the "Setting MQTT Broker to Send Data."
Step 3Confirming the data sent to MQTT Broker
* For details on how to save and start a project, refer to Chapter 1 Lesson2 of <Learning contents> [Basics]
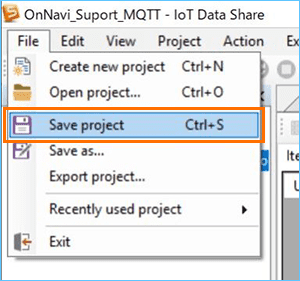
Select [Save project] from the [File] menu.
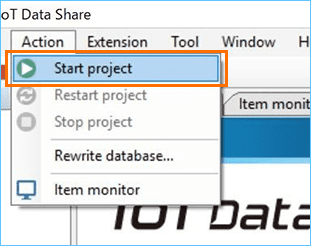
Select [Start project] from the [Action] menu.
Receive the data sent to MQTT Broker with another PC and verify that the data was sent.
* This example uses MQTT client application "mosquitto" installed on the same PC (Linux OS) as MQTT Broker to check the data.

●This completes the "How to send data to MQTT Broker" procedure.